Showing posts with label pinterest. Show all posts

Friday, November 30, 2018

CASE: Kinda Eclectic..


Hey,

Happy Friday to you!!

Hubby and I leave for London tonight, part work, part fun. It is my companies annual Christmas trip - they take all of us employees and our partners on a 3 day European vacation - I know, unbelievable right?!

This year we are going to Porto in Portugal and we are leaving a week today, but before that we are heading to London for a few days with our families and a few days of working out of our London offices.

Today's card I actually made for a friend, then decided that it was too fussy for her (she is the Queen of CAS).

It's actually a CASE of a card I saw on Pinterest and realised that I have that stamp set!


The stamp set is Kinda Eclectic by Stampin' Up and I think it is discontinued now.

I kept most of the card as a straight CASE, but used a different large Butterfly (Clearly Besotted) and sentiment (Scrapbook.com own brand).

It's actually in my hand luggage, as I think my Momma might like it for one of her friends / colleagues.

Have a great weekend, I'll be napping, eating, hanging with my folks, going to SoccerBall with Poppa and missing my craft desk.

Cx

Wednesday, June 7, 2017

Feeling Inspired...


Hey,

I was browsing through Pinterest and I came across a few ideas for using a stamp set I had, it inspired me to have a play..

The stamp set is Wherever You Go by Stampin' Up, a lot of people used the bridge with the compass stamped behind it and I liked that.

I decided to create a blended background and pulled out all the blue distress inks I have and went to work..I cheated a bit by using a stripe stencil, so I could control the colour application easier.

Once I had the background, I went over it with white ink, then spritzed it and dabbed it with a piece of kitchen town. It gives that softer mottled look.

I stamped the bridge, the compass and the sentiment using my Misti, so I could do it all in one hit!

I thought the black cardblank was perfect for making my panel pop.

Super simple make, I had fun with the background.

Cx

Sunday, April 9, 2017

Birdies...


Hey,

I have a lot of bird stamps. I love large birds of prey, I am not so keen on smaller birds!

But my love of big birds does mean I am drawn to bird stamps.

I recently made two cards for friends, using bird stamps that are both really different.

The main card uses a mix of stamps - I love it when I can use my stash this way.

I started with the leaf stamp and to add interest to the leaves, I stamped it twice, once in a pale blue ink and then just the edges in a darker blue, the stamp is by Stampin Up and I love the effect I get when I use two colours. I stamped the sentiment in a coordinating blue, it is one of my faves by Hero Arts. Final touch was the bird, he was a gift from JT and is one of the Tim Holtz crazy birds. I love using the crazy birds, they make a slightly twee card a bit more edgy!

The second card today is a CASE, I loved the card I saw on Pinterest and decided to have a go myself.


I really like the final card, I used watercolours for the colour splodges and the stamps are by Pink Fresh Studio.

I love it when I get to make simple cards that are a bit different to my normal style.

Cx

Saturday, February 18, 2017

Kim Dellow CASE...

Hey,

I saw a great Pinterest card by Kim Dellow that I totally had to CASE.


I really love Kim's work and I thought this card would make a great set for a friend.

I tore pages out of a thesaurus that I bought for using in Mixed Media projects and I created a giant watercoloured background, so I could punch out the flowers (using a Stampin Up punch).

I drew in all the details for the flowers using a .3mm letraset pen.

All the backgrounds were either created using stencils, geli plates or background stamps. And of course I snuck in a tag version...

The sentiment and the awesome die are by Neat & Tangled and I affixed the awesome to all the cards using staples.

Super easy to make and fun to do, it felt like playing in my art journal.

I love how different each card is.

Here is a close-up so you can see the details.


Here are the rest of the cards - 6 in total.


 I love it when a Pinterest CASE works out even better than expected..

Cx
Monday, December 19, 2016

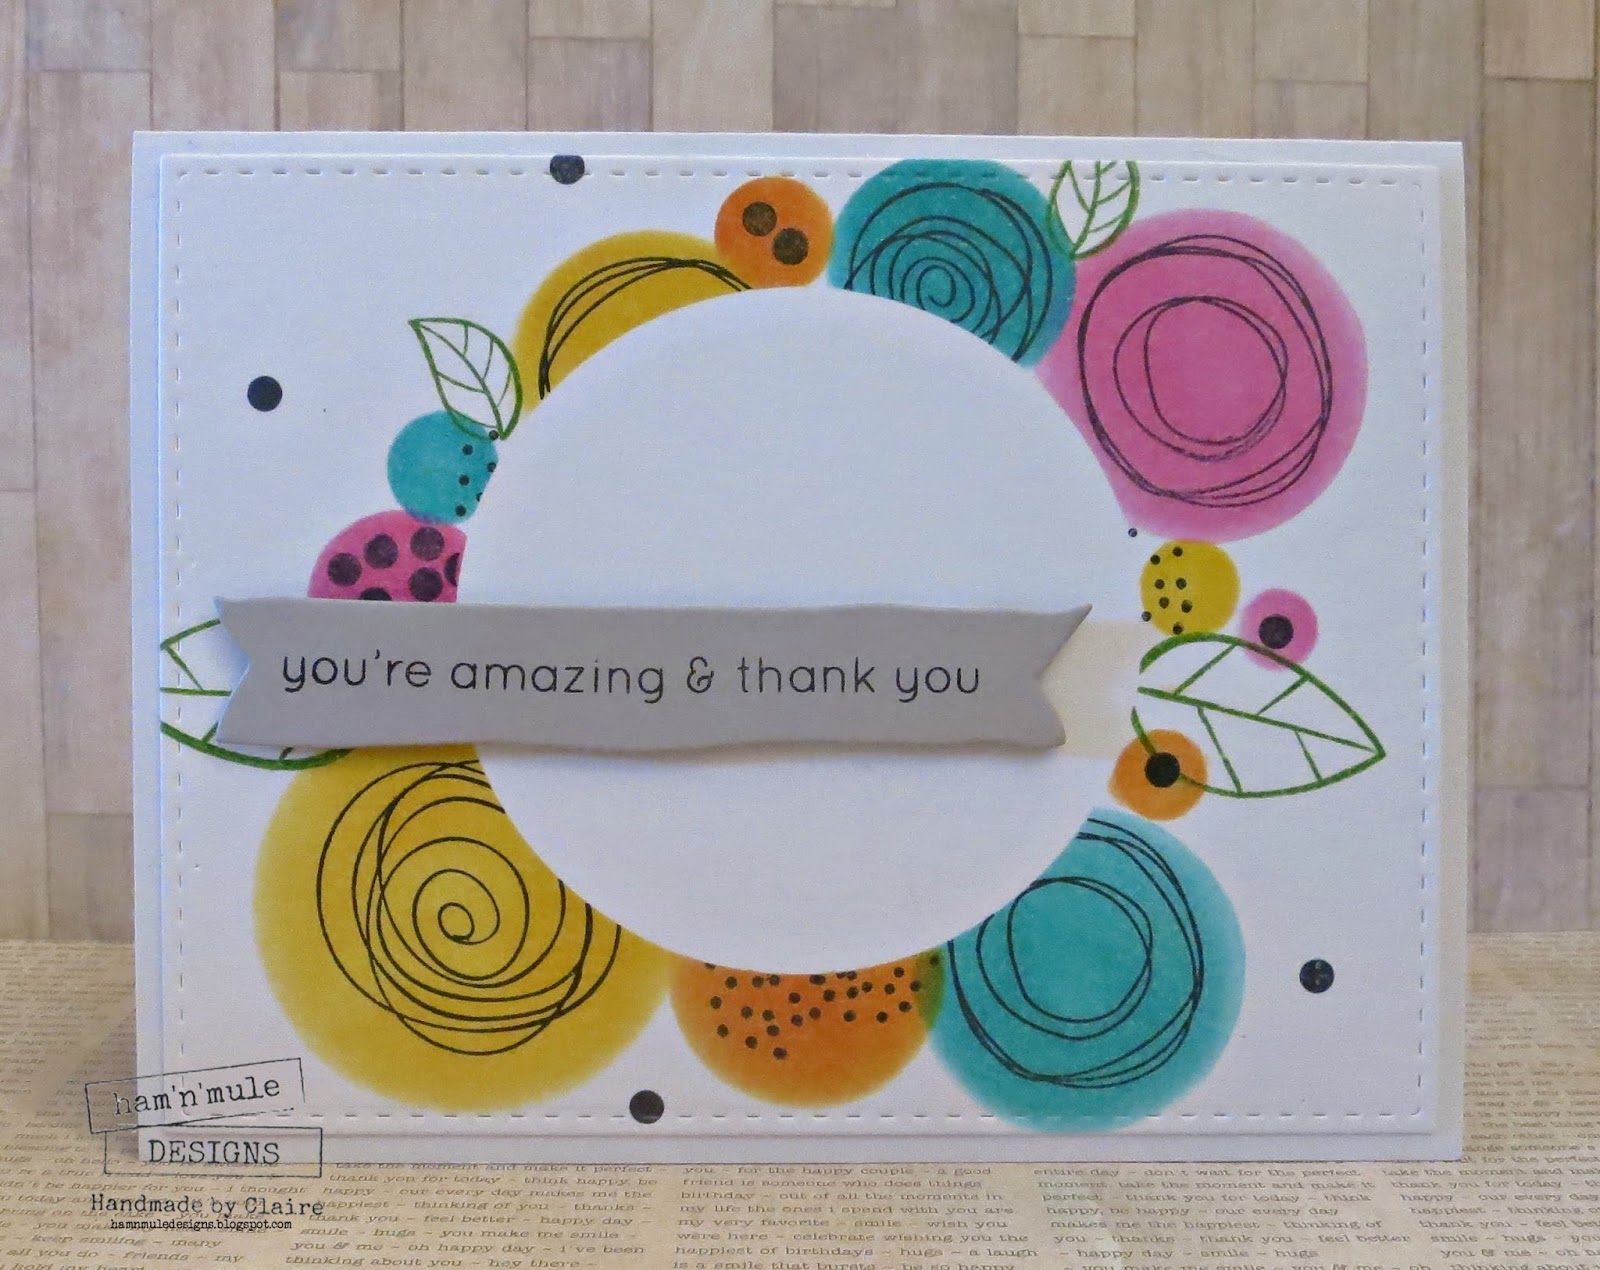
CASE: Circle Mask Flowers...


Hey,

Happy Monday.

Only 3 more work days this year, then rest, desk playtime and hangs with the Hubs, glorious.

When I am a bit stuck for inspiration and want to play at my desk, I head over to my Pinterest ideas board..

I came across this -

Image credit - Therese Calvird for Altenew
Gorgeous right?

So, I decided to have a go. I had two scrap circles on my desk, so I used those as my centre masks - one is bigger than the other.

I used a great Artist Loft circle template to create my circles - if you don't have one of these, you need one, they are super useful. I used mini daubers to apply the colour.

I stuck with four colours for both of my cards - all distress inks - Picked Raspberry, Spiced Marmalade, Mustard Seed and Peacock feathers.

Before I lifted off the circle mask I stamped all the details onto my inked circles, to create the flowers. For this I used three Simon Says Stamp sets and a Lawn Fawn set - Scribble Flowers, Favorite Flowers, Handwritten Floral Greetings (SSS) and Our Friendship Grows (LF).

Here is the other version.


To finish off I die-cut the panels using a SSS stitched die and added the sentiment. The sentiments are also by SSS Sketchy Banner Greetings and dies (they don't make this set anymore)

Sounds like a lot of work, but it really was very simple and I had a lot of fun creating them, totally doing this again.

As this is a CASE, it is only good manners to provide links to Therese's blog and the Altenew post.

Cx
Wednesday, November 23, 2016

Wishing for Flip Flop Weather...


Hey,

So a while ago I saw someone on Instagram / Pinterest use this great stamp by Your Next Stamp..

I had to have it (Instagram / Pinterest hurt my wallet).

I love it, as you know JT and I have a crab thing..long long story. I figured I could get some milage out of this bad boy.

I stamped and die-cut him out, I coloured him using Zig Clean Color brush pens. Love the shading I do so easily with these pens.

This card was the inspiration for my background -
Card by Kate at Small Bits of Paper
I liked the idea of using just 2 inks to get the background.

For a bit of interest I chose to use a wood line stamp by Prima Marketing for my background and used Salty Ocean and Mustard Seed inks for my sky/sand. I spritzed the stamp with water before laying down my paper and I just LOVE the effect I got. I die-cut it out using stitched rounded dies by MFT.

This card didn't actually go to JT, it went to Queen of the Flip Flop - Jenn Shurkus..she loves Flip Flops and the sea and summer, so it was naturally a card for her!

Also I got another Honorable Mention over at CASology for my Embrace entry, how nice is that, what a wonderful start to the holidays.

Cx


Friday, July 29, 2016

CASE A Card..Grid Scraps...


Hey,

Happy Friday.

I am leaving for London later on today, so my posts will pretty much be scheduled for the next 10 days..

As you know I have been recently having a Pinterest CASE frenzy! Today is the latest one.

I saw this card -

Image courtesy of Snippets by Design
I really liked the grid idea and the idea that it could be made from scraps. Wasn't keen on the twine though, so left that off of my card.

As you can see from my card, this isn't a straight CASE. I used all spotty papers by Lawn Fawn, die-cut and heat embossed sentiments and added little pearls to my heart and star.

Not the easiest card, as I had to work out the grid, so I could cut the scraps to size, but it was a great way to use scraps and is so bright and spotty I love it.

I need to think about how to make it easier, so I can make tons of them :)

Have a great weekend, see you in London tomorrow.

Cx

Monday, July 18, 2016

CASE a Card...Flowers..


Hey,

Happy Monday, I am off today, hanging out with Ma, following our weekend in Philly and Sunday spent with JT's parents.

Following on from yesterday's post, I thought I'd show you another of my Pinterest CASEs.

I chose this card - 

Image Courtesy of Cupcakes, Cards and Kim
I love this idea of scribbly circles as flowers..

I pulled out three stamp sets by Simon Says Stamp - Scribble Flowers, Favorite Flowers and Birthday Flowers to use on my card.

I also decided not to stamp the solid circles but used Distress stains and kind of splodged them onto my paper..

For the main card I used Abandoned Coral, Squeezed Lemonade and Peacock Feathers stains. It is a pretty straightforward CASE, no real modifications, but it was so perfect, I didn't want to change a thing :)

Obviously I made a whole bunch of these as they take about 5 mins to do, once you have got your colour splodges down.

Here is another colour variant, using Picked Raspberry, Mowed Lawn and Peacock Feather stains -


These were super simple to make and I really love working with Distress Stains, you get such rich colours and no mess!

Cx

Saturday, October 24, 2015

Fall Swap Box...


Hey,

Hope you are having a good weekend so far.

My friend Denise is here from San Diego and I dragged her with me to Cheiron's class last night - it was a hoot, more about that next week.

I wanted to show you the box I recently put together for my Fall Swap partner..check out instagram for more info - it is run by the talented Gillian and is a great idea.

I had a whale of a time, planning, shopping and making for my partner Amber.

The main photo is of the card and envelope I made for Amber to go on top of everything that is in the box. I used the Pinterest CASE that JT and I used last weekend as my inspiration.

Below is a photo of one of the cards I made as a set for Amber. I cribbed the idea I used for my friend Michelle's birthday card, but used a new spotty Penny Black background stamp for a slightly different feel.


Here is a shot of everything in the box - all neatly wrapped in Amber tissue paper LOL!! I had lots of fun stamping that and its actually given me a few ideas for Christmas.


 Enjoy the rest of your weekend.

Cx


Wednesday, August 12, 2015

Tissue paper backgrounds..


Hey,

Recently, I saw this great idea for kids on Pinterest, it looked easy and fun, so I thought I'd give it a go.

I must point out though that they do point out the ink from the tissue paper will stain your fingers, so wear gloves. They are right. I did not listen, I have had inky fingers since Sunday...

Make sure you use bleeding tissue paper - not regular gift wrap tissue paper. I got mine from a cheapo store in London ages ago, but they sell it in most dollar stores.

The main photo today shows the hexagons I used for some of the backgrounds and a few of the backgrounds.

I did a few different things with the backgrounds.

I decided to cut an aperture in the background for these cards, I used a SSS stitched circle die, then I cut the SSS Smile die - which fits the aperture perfectly.

Both the backgrounds were cut out with a MFT stitched rectangle die.

I created a fun sentiment for the cards, but using a SSS stamp that worked with smile..


This card used the offcut from the cards above. This is an anniversary card for a special friend and her husband.. So I went to town a bit. I stacked punched hearts to add a bit of dimension. Because I did not have glittery purple card I decided to colour one of the hearts and then added embossing ink and sparkly Judikins embossing powder.

Love the faux glitter paper effect.


Final card for today is also an anniversary card. I love the giant Happy - the die is part of a trio by WPlus9.


I have some more cards to show you tomorrow using this technique.

Such an easy technique that gives such different results. I am looking forward to using different punches.

Cx

Wednesday, May 20, 2015

Turning Ma into a Crafter...


Hey,

Late post from me, but I wanted to share what Ma and I got up to today :)

Yesterday when we were out, we bought a 10 pack of Lip Balm's as I wanted to try this excellent Pinterest idea..

Ma hijacked me and decided that they should be gifts for her work colleagues..who I am to argue!

As they were going to be gifts from Ma from New York, I dug out a great Deep Red Brooklyn Bridge stamp for us to use on the cover.

After a few tutorials from me, Ma did all the stamping, the scoring, the corner rounding and the ribbon threading.

I did all the 'stage managing', trimming, measuring, affixing of the lip balms (using glue dots) and the bagging up.

Fun times crafting with my novice Ma, but she got it and she later went on to make a bday card, that we did not take a photo of!

Cx

Thursday, April 16, 2015

Double CASE...


Hey,

The Paper Players challenge this week is a great set of colours that got me all inspired -


I turned to Pinterest for some layout help, when I stumbled across a Pin, which turned out to be a CASE..so my card is the Double CASE!!

I loved the idea of masking of a section for the sentiment and partly stamping the sentiment into the detail.

I die cut a piece of white cardstock using my SSS stitched rectangle die and masked off the bottom half so I could stamp the top of the card, I then rotated it and did the same thing for the bottom.

I used Favorite Flowers stamps by Simon Says Stamp in the 3 challenge colours (I used Tsukineko inks that matched, Turquoise Gem, Rose Bud and Pear Tart).

I added Recollections enamel dots and bling in the 3 colours for a bit of dimension.

Final step was to stamp the sentiment and I added a bit of bling for the i in favorite.

I love it!! Thanks again to Paper Players for inspiring me another great theme.

Cx

Saturday, April 11, 2015

April showers with some colour...


Hey,

So this week has been a bit traumatising for me - I broke my foot and I have a really bad cold / virus of some sort - sigh..

In an effort to be positive and cheery, I thought I'd combine 2 challenges -

Craft Stamper - Take It Make It, April - Colour
Simon Says Stamp - Wednesday challenge - April Showers and/or Spring Flowers.

I saw this great card on Pinterest and it inspired by card.

What did I use? -
A new Neat & Tangled Cloud stamp - from the Clouds set.
Confetti stencil by Heidi Swapp.
SSS Stitched rectangle die.
Hero Arts sentiment stamp.
Memento inks for the hearts and the sentiment

I added some glitter here and there for some shimmer.

A really cheerful simple anniversary card..I will definitely be making variations on this using the other cloud stamps in the set.

Cx

Friday, March 27, 2015

On my way to Providence..


Hey,

Happy Friday everyone!

It's been a busy week - so my craft time has been limited, but that is all about to change :)

I have the day off today and I am heading to a great art retreat hosted by the fabulous Jenn Shurkus.

The whole trip is making me giddy and super excited, I've not been on a train since we moved and I love trains, so that will be fun. I've also never been to Providence, so I am looking forward to arriving at a reasonable time today so I can have an explore.

It also means 2 nights in a hotel - this is my HUGE treat to myself..Hubby and I are looking forward to some alone time - we spend nearly all of our time together now that we live in NYC and its nice to have a bit of a break :)

And of course a whole day of making with other crafters..like an epic playdate.

The main photo today of the cute little boxy pouch thingies, that I made for all my fellow retreat-mates.

Super easy to make..CASEd and modified from Pinterest.

Supplies used : old super long card blanks, scrap papers cut to size, crop-a-dile, twine, cellophane bags, brads, choccies!

Hope I made enough..

Have a great weekend..I am super happy mine has started..

Cx

Wednesday, March 4, 2015

Pinterest CASE...watercolour squares..


Hey,

I saw this great card and tutorial when I was cruising some blogs a few weeks ago -


It's by Julie Ebersole - via the Ellen Hutson classroom blog - which I love!

I am very pleased with my version and I added a name so it could go to one of my work colleagues.

In the tutorial Julie shows you how to dab some of the paint off of the squares, muting the colours slightly. I didn't dab all the squares, as I wanted more variance in the colours.

I love a Pinterest CASE..doing them helps me push my boundaries.

Cx

Thursday, February 19, 2015

Erasers put to work..


Hey,

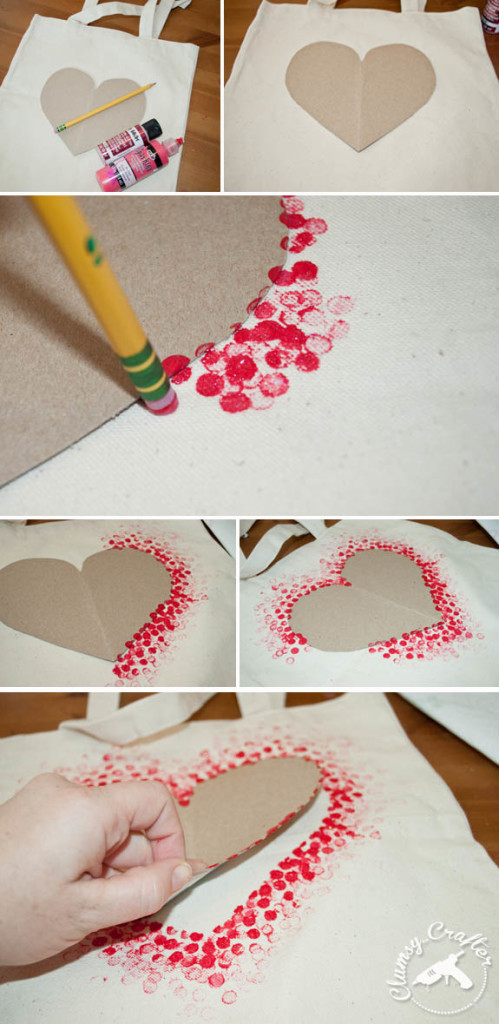
For a while now I have been eyeing this great pin and tutorial on one of my Pinterest boards -


I figured I could make this work as cards..

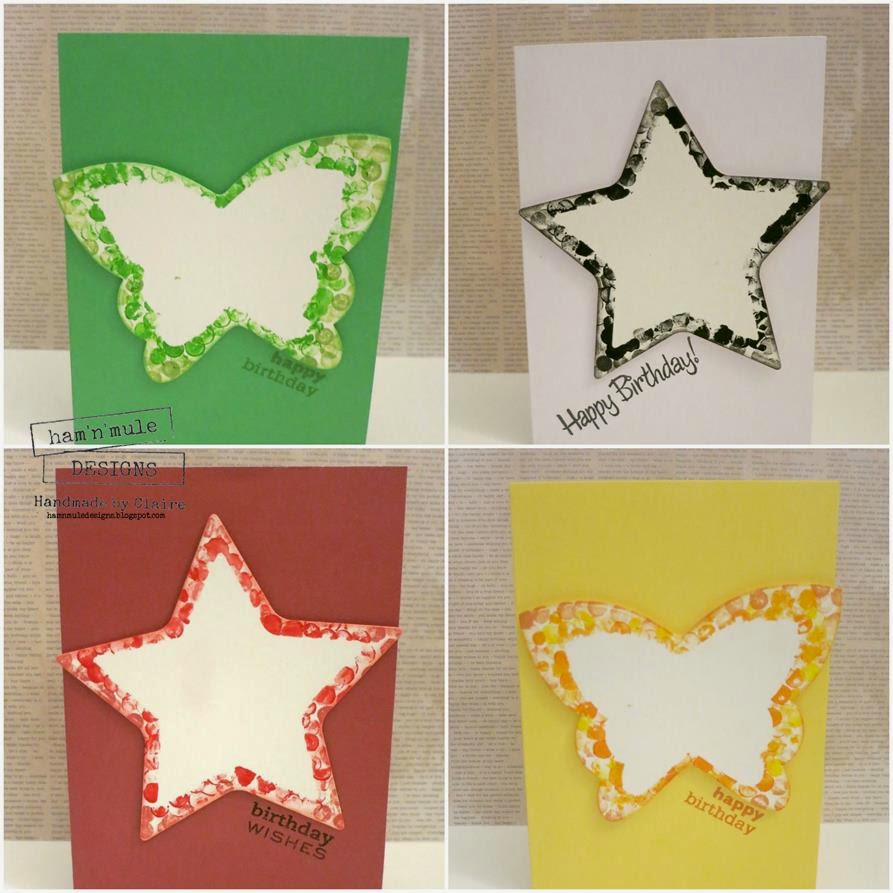
I die cut a star, a heart and a butterfly - all from nesting dies - this is important for later on. Don't use the biggest die. I rooted around and found some un-used pencils and acrylic paints.

I then used removable glue to stick the die cut shapes to Canson Mixed Media paper.

As my paints are seriously old and dry, I spritzed the eraser with water and dragged it across the hard paint!

Then I dabbed over the edges of the die cut, I did this until the paint ran out and then got a bit more paint and repeated this tons of times. Then taking the next size up die, I cut around the eraser dabbed shape.

Once you have the finished die cut, you might need to add some more eraser dabs. To tidy it up and fill in some of the white space, I inked around the edges of the die cut.

I mounted the shapes onto contrasting card blanks and added a sentiment.

Fun way to spend an afternoon..here are the rest of the cards.


Cx

Thursday, January 8, 2015

Vignette CASE...


Hey,

So back to work properly for me today and Lemon returns home (sob)..

Last Monday (29th Jan) whilst I was waiting for Lemon to arrive, I saw this on one of my Pinterest boards -


I loved it so much, that I thought I'd CASE it..

I ended up making 3 versions - the main photo today is the Orange/Yellow version.

For all 3 of the cards, I used a Happy die and cut it in white - I didn't layer it like the Pinterest version, I wanted it to be flatter against the card.The 'just a note' stamp is by Wplus9. Bling by Papermania.

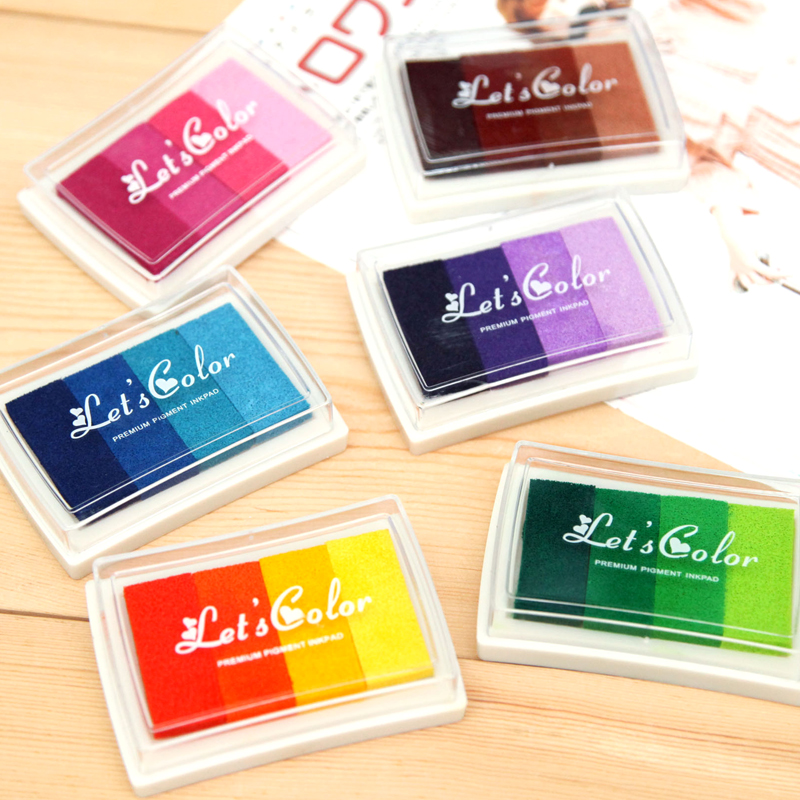
The ink pads are a new purchase, that I bought from Aliexpress (Chinese eBay sort of..) they are like a vignette of colour -


I bought 3 of them - Orange/Yellow, Purples and Greens.

Here are the other 2 cards -


I used a different 'Birthday' stamp for each of them and contrasting ink. The best choice of stamp was the one I used on the Orange version.

I am really pleased with how these came out, I'll be making more, maybe using a different main word.

Cx

Monday, December 8, 2014

Skype playdate fun....


Hey,

Hope you had a good weekend! I did!

I hung out with Hubby this weekend, we did dinners and brunches and shopping and lounging..fun times.

Yesterday I had a great playdate with JT..we gossiped about craft and life stuff. We opened Christmas present early. It was mucho fun, just like old times..only remotely - little bit sad..

We made 3 cards using some new parts of our kit where we could.

The main photo today is of the first card we made. We used this gorgeous idea from Pinterest as inspiration.

Pinterest inspiration
I decided to use the new tag dies that JT sent me. I punched the white card using a random $1 EK Success punch. I assembled the tags using foam tape, a brad and a sentiment by Hero Arts. To finish the card I added some wooden adhesive dots.

I recently bought both JT a Ellen Hutson die - Treat Yo' Self - it has caused much hilarity between us. So card 2 was all about this crazy die -

Playdate Card 2 - Treat Yo' Self
I had the heat embossed piece on my desk already. A few nights ago I was having a play with my new SSS Dec card kit Ranger embossing powders this one is Enchanted Gold and its super glittery. I used it with a Heidi Swapp mini circles stencil. I die-cut Treat Yo' Self from a scrap of hexagon paper. I added 'it's your birthday' to give the big sentiment some context :)

I love this die, everything I make with it, makes me smile.

For the last card of the epic date, we worked with something we had purchased on Black Friday -

Playdate Card 3 - Something new..
I opted to use new papers that I bought as part of a random scrapbooking mini kit at Burlington of all places - for the grand sum of $3! The kit came with all kinds of stickers, so the gold start at the front is one of the stickers mounted using a foam pad. I die cut the star and the happy from scraps - the yellow paper was embossed, so adds a bit of texture.

I'm going to stamp Birthday inside this one before I use it.

A fun way to spend my Sunday morning. Miss you man.

Cx

Monday, November 24, 2014

Pinterest Idea - brought to life....


Hey,

So a few months ago I saw a pinterest idea that I wanted to try as a Christmas gift.


You make a calendar that fits a 4x6 photo frame. The idea is to decorate the calendar any way you want.

I decided to use digital stamps for all the months, add some text and hand colour them.

I am super pleased with the outcome.

WIN!! Its the first big Pinterest project I have tackled and it was really easy - but time consuming - because not only did I have to make and colour the calendar, but I added the acetate to the window and painted the frame from natural wood to white!!

Here is another photo -


I put all of the months in the back of the frame. Made it all neat and tidy for wrapping.

Cx