Showing posts with label wplus9. Show all posts

Tuesday, May 20, 2025

Retro Rubber Challenge #255 - Colour challenge..


Hey,

Welcome to another fun Retro Rubber challenge.

This time we have a fun colour challenge for you. 


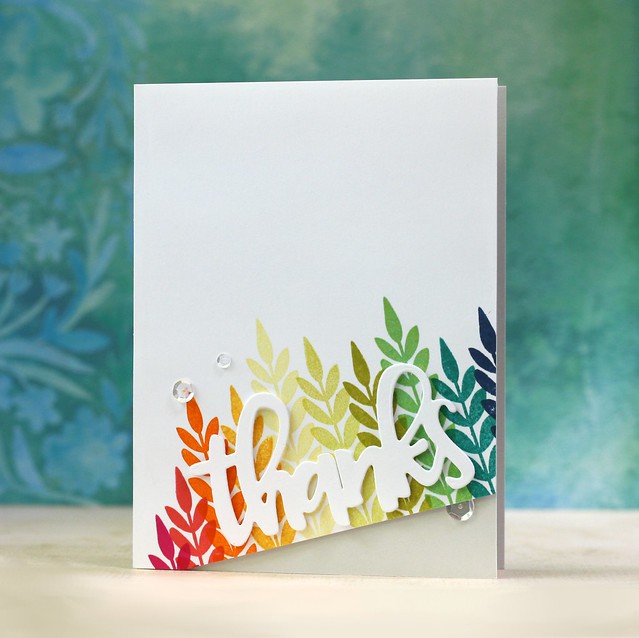
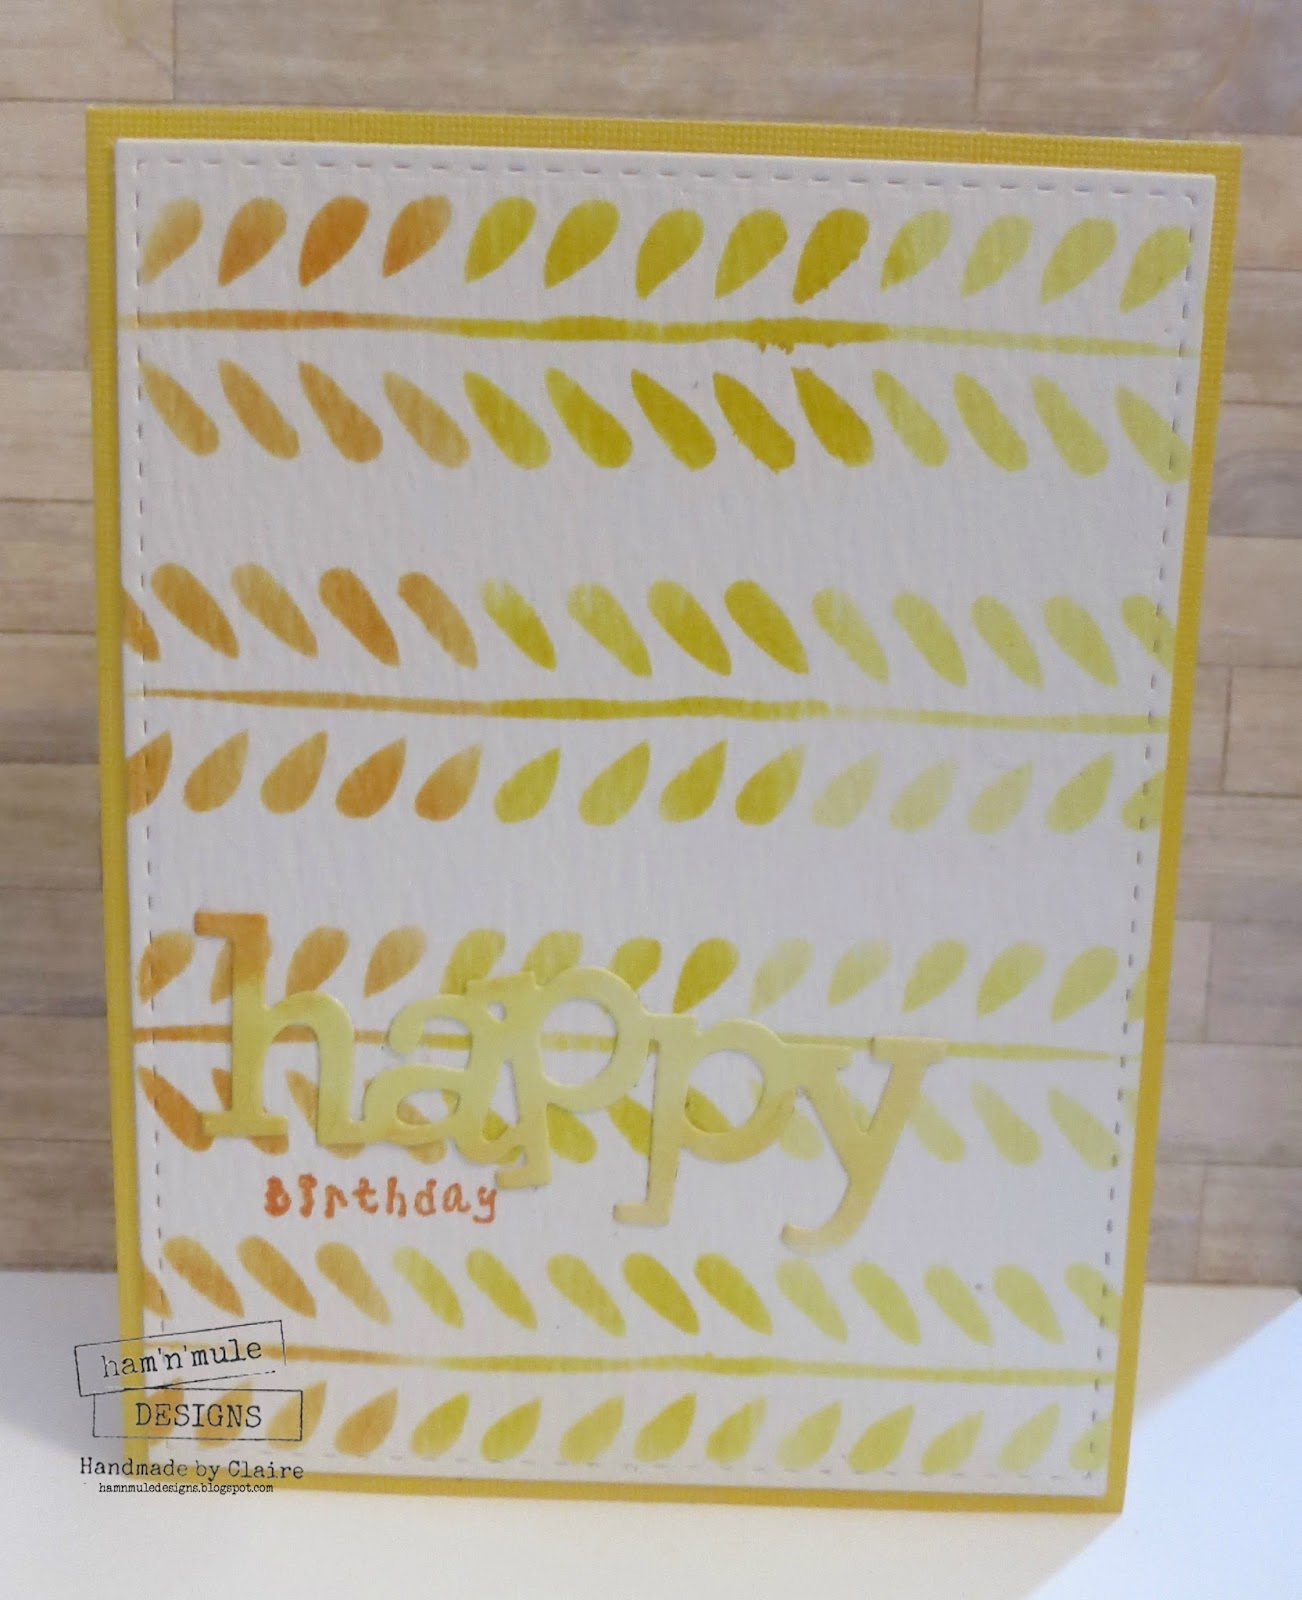
These are my kind of colours!

When I was digging through my stash, I found the amazing piece of patterned paper that you see on my card, it's like the colour palette for the challenge was built using this!

I stamped the sentiment (by Stampin' Up 'Best Butterflies' I've had it since 2022) onto a piece of coordinating solid cardstock using Altenew Lagoon ink. I dug out an ancient set of Happy dies by WPlus9 - I've had them since 2014 and they were my most overused dies for a while. I cut the Happy from lime green to coordinate with the palette.

Simple, easy card. That I tucked in my bestie's luggage before she left on Sunday :) She has been here for 3 weeks and it was lovely to have her here for so long!

How will you use the colours? Be sure to pop over to Retro Rubber, and get inspired by the things the DT have made.

Challenge ends March 30th.

Don't forget to tell us the age of your stamp, that is part of the fun of our challenge, and please only enter 5 challenges including Retro Rubber.

Cx

Tuesday, August 3, 2021

Retro Rubber Challenge #164 - Anything Goes...


Hey,

Welcome to another awesome Retro Rubber challenge.

It's everyone's fave this time - Anything Goes!!


Anything goes is great, it truly is the time to dig out some of the super neglected stamps.

This card uses x2 of my all-time fave stamp sets. The birds, the line and part of the sentiment are by WPlus9 from their 'Happy Birds' set that I have had since 2017 and the 'It's your birthday' stamp is the most overused thing in my craftroom, so much so I have a spare one! It is by Simon Says Stamp 'Big Birthday Wishes' that I got in a kit in 2016.

I decided this was a perfect time to create another stenciled cloud background (I can't stop doing this), using the MFT mini cloud edger with distress inks.. If you don't have one of these, you need it in your life.

The rest of the card was super simple, stamp and colour 2 of the birds from the set and stamp the line, so it looks like they are sitting on something.. rather high up LOL.

This is one of my fave makes I think this year!

What are you going to dig out of the archives to play with? Pop over to Retro Rubber and get inspired by the things the DT have made.

Challenge ends August 13.

Don't forget to tell us the age of your stamp, that is part of the fun of our challenge and please only enter 10 challenges including Retro Rubber.

Cx


Thursday, March 18, 2021

Fusion Card Challenge - Eggs

Hey,

Welcome to another fun Fusion Card Challenge.

This time we have 'Eggs' for you! As always both the sketch and the inspiration image are awesome.


Which will you try?

I was aiming for a fuse, but I am not 100% convinced by my sketch interpretation... 

But I loved all the brightly coloured eggs, so I am on point with the photo!

I am a big fan of Panda's they are perfect for all genders, ages and occasions. I love this little cutie, by Wplus9 from 'Friends for all Seasons'. Isn't he adorable holding his little basket of eggs! 

The background paper is from an Easter kit I bought a couple of years ago by Lil Inker, who sadly are no longer around. I love their stuff. 

My rounded dies are by Sizzix and I think I have had them for over 10 years, they are actually way more useful than I thought they ever would be!

The sentiment is from the same set as the Panda and made me smile so I used it here.

Make sure you check out all the rest of the inspiration by the DT over at the Fusion challenge blog, and play along with your own creation! When playing along you may use the sketch OR the photo to inspire your makes. OR, if you are feeling adventurous, you can fuse them together (see what I did there!).

Can't wait to see your makes. 

Challenge ends on March 30th.

Cx

Friday, March 30, 2018

Shopping Our Stash: No Ink...


Hey,

Happy Good Friday,

I saw Lauren Bergold's card for the current Shopping Our Stash challenge and I was intrigued by the idea of no ink!!

I mean, no ink at all, no markers, no ink pads, no sprays, etc...

So I decided to rise up to the challenge and shop my stash to make a card.

The starting point for my card was the awesome Llama sticker from Michael's, I bought it a while ago and it's just been sitting on my desk staring at me!

Also on my desk were 3 scraps of paper that I also used on my card - the lilac strip, a pink piece (Happy die) and a green piece (Birthday die).

I embossed a piece of turquoise paper using a leaf embossing folder - also from Michael's - to use as the central piece of my card.

I love the crazy, bright, weird card I ended up with.

I am betting whoever I send it to is going to be a little bit surprised by it's craziness.

Have a great weekend.

Cx


Wednesday, October 4, 2017

Christmas Card 2017: Wplus9 Holiday Hugs...


Hey,

So yesterday went well and Hubby and I have new visas (well, we will have when we get our passports back).

I loved this Holiday Hugs set by Wplus9 from last year, but I didn't buy it then because I had spent enough!! I managed to get it second-hand - including the die!

I kept it all super simple and coloured the bears and the girl using Spectrum Noir sparkle pens. The sentiment is from the stamp set.

4-bar cards are my new fave format for Christmas cards!!!

Cx

Wednesday, June 28, 2017

4 cards 1 stamp set: Wplus9 Happy Birds..


Hey,

So today is fun, as I am linking up with my friend Jen to show you the cards we made using the Wplus9 Happy Birds set.

Before we get into the cards, let me talk a bit about Jen.

She has been one of my online craft crushes for a long time. Then last year she reached out to me via my blog and BOOM huge friendship - she is awesome and her messages / emails make me howl with laughter. She is totally my kind of people. Thank god for the internet. We get to meet face to face in 4 weeks - OMG so excited I am wiggling as I type this.

You might remember her being mentioned here before as she sent me the Monster stamps I so desperately wanted! Anyway, check out her blog, she is wickedly talented, has the most excellent sense of humour and is an all round sweetie pie.

I used this stamp set recently and mentioned that I wanted to do 4from1 with it and she said wanted to do it too - hence our linked posts.

I did something a bit different for me and stamped, coloured and cut all the birdies first. It meant that I had to think about what I was going to do with them and so they were all coloured to suit their cards. I used distress inks and an aquabrush to colour them.


My fave of the whole batch is the one that became and anniversary card for my in-laws (45 years!!). I thought it was romantic enough to work, but not so girly that my FIL would be all eye rolling!


Just going to show you one more, so this post doesn't become war and peace!!

I chose the french fry card - I love the sentiment, I added a bit of texture paste to the white panel, so the bird stood out even more. The 'Happier' stamp is by Neat & Tangled  - awesome set, comes with so many fun sayings.


Confession time, it took me WAY too long to realise that the bird is holding a fry (DUH!!)

I can't wait to see what Jen has made.

Watch this space we'll be back with another 4from1 soon.

Cx

Friday, June 9, 2017

Happy Bird-Day...


Hey,

Happy Friday!

It's been a fun week here in NYC, one of the owners of the company I work for was here along with x2 other colleagues, so there has been much eating, drinking and gossiping.

I am excited as Cheiron is teaching two cool classes at Westbeth this Sunday and I am going to both.

I have a super early PT session tomorrow - ugh, but I am feeling better, stronger and smug, so totally worth it.

I made today's card for my colleague and friend Natasha, I adore her, she is my kinda people.

I thought some smooshing would be a fun backdrop for the birdie, but once I put it together I felt like it needed something else.

So I created a 'flower' using a scalloped circle die and a stitched circle die, I am much happier about how it looks!

The birdie and the stamped sentiment are by Wplus9  - this set is still out on my desk for a four from one playtime and the giant happy die is by Simon Says Stamp.

I am so happy with this card and it arrived safely and Natasha told me she loves it!

Have a great weekend.

Cx

Friday, April 14, 2017

CASE Laura Fadora...


Hey,

It is Good Friday today, I am still in London, heading up to my in-laws in MM today to reunite with Hubby and hang with his family for a couple of days.

I love Laura Fadora, she is totally one of my craft crushes, I love how she uses colour. She is very inspiring.

I loved this card she made -


I have the Give Thanks stamp set by Concord & 9th, that Laura used on her card and it has been a bit neglected, so I decided to have a play.

I made mine into a colourful birthday card. The Happy die is by Wplus9 and this is my first time using adhesive foam for dimension. I really like the effect you get and I am super happy with my card, I love the different shades of colour.

I use Tsukineko inks, I have nearly all of the memento dewdrop colours, they are easy to store as they are small and I love the colours. I do have the odd inkpad by other colours, but these and distress inks are my default. One day when I have more space I would love a set of Lawn Fawn inks..

Here is a variation using Amazeballs stamp set by CAS-ual Fridays.


Slightly different as the stamp is not solid, gives a more subtle effect..

Cx


Thursday, March 16, 2017

Gelli Plate Backgrounds...


Hey,

A couple of weeks ago, one of my art crushes Kim Dellow showed a great way to use your Gelli Plate on Instagram.

I had to try it out that day and I am so pleased I did.

I have been using the Gelli Plates with varying degrees of success, but I think now with this simple technique I will be getting much better backgrounds.

All you have to do is cover the Gelli Plate in a colour using a brayer, then stamp that onto paper (I chose to use watercolour paper). Then clean the plate and put a stencil over it and then add paint over that using a brayer. Remove the stencil and stamp over your solid colour - voila! amazing backgrounds.

Here are mine -

 Aren't they pretty?

From left to right clockwise, the stencils are by Dutchdoobado, Tim Holtz, Dina Wakely, Dutchdoobado and Recollections.

I have only made cards using 3 of them so far, the main photo is my fave, it makes me laugh.
I thought that background looked a bit Jungle, so it needed a Dinosaur (The Alley Way Stamps, sadly no longer in business) and I added balloons that are a mix of dies and punches. I coloured the balloons using distress stains and the Dino using distress inks. The sentiment is by Simon Says Stamp.

The next two cards use roughly the same idea, giant die-cut sentiment, finished with a stamped sentiment.
Wplus9 happy die, Neat & Tangled birthday stamp
Winnie & Walter birthday die, Neat & Tangled happy stamp
I'm pleased with the colour combos here and JT helped me choose the yellow for the scalloped background as I couldn't decide.

Cx

Wednesday, February 15, 2017

Showing off my MISTI Skillz...


Hey,

It was JT's birthday last week and I bought her a faux MISTI - works the same, just 50% cheaper.

I thought it would be good to make something to show her the benefit of this extra tool (I love a tool and keep enabling her...)

I stamped these cards using the MISTI and it makes it ALL so much easier.

I die-cut the white panels first, makes it easier to position everything.

Then I stamped the doily border in four different colours, no need to move the stamp, just clean and put a new piece of paper in the MISTI.

The stamps were a freebie as part of Stampin' Up Sale-a-bration and are called Delicate Details..I am already in love. The inks were also a freebie from my Retro Rubber teamie Debbie (who is my SU demo) she had a spare set and sent to me, how sweet is that!

The hello stamp is by WPlus9 and again, I lined it up using the MISTI and stamped it 4 times, simples.

I mounted the white panels onto grey card blanks and added some sequins.

Super simple, elegant cards that were a breeze to make.

Cx

Saturday, December 17, 2016

Watercolour Splodges...

Hey,

Happy Saturday!

I can't believe there are only 3 more working days to this year..where has it gone?!

Hubby and I went to KTown (Korea Town) in NYC last night and ate a lot of amazing food. Today we are off to brunch with some friends from London who are in town for the weekend. I also have a skype playdate set up with JT for Sunday.

I'm sharing a simple card today.

I bought the stamp online at one of those random Chinese sites..I just loved it and it was $1..

The white panel was die-cut using one of my Black Friday embossed rectangle dies by Lil Inker - it's so pretty.

The watercolour splodges were a bit of a challenge, because I wanted to position them so that the Dandelions would look right when I stamped it over them. I could have stamped the Dandelions first, but I wanted it too look random.

I was pretty pleased that when I stamped the Dandelions they were perfectly positioned over the splodges.

Final touch was to add the sentiment and a few splashes of paint.

Simple and quick.

Cx


Saturday, January 30, 2016

Texture birthday..

Hey,

Today I am showing you a card for a work colleague.

He just happens to share the same birthday as JT and is also my work buddy and has been super helpful.

I wanted to make him a fun card.

He cycles so I thought the chevron Ferro metallic paste offcut would be a perfect starting point.

To help keep it manly..I used a Wplus9 happy die and a Tim Holtz word die in black card.

I like the mix of fonts and angles and the patchy texture paste feels like a real bike did it..

This is why I love scraps.

Cx

Thursday, January 28, 2016

Wplus9 Throwback Thursday...


Hey,

One of my craft resolutions this year was to join in different challenges.

I love Wplus9 products and I have several of the stamp sets and dies.

I thought it would be fun to join their current Throwback Thursday challenge...

This time we are being asked to dig out our older Wplus9 stamps and make Valentine's cards...

I decided to turn mine into a little set for a friend that asked me for some I quote 'smushy' cards..

I based my cards around this fabulous set that I have had for a while -


They were pretty simple to make. 

I die-cut a stitched rectangle from watercolour card and then placed the sentiment stamp on the card where I wanted to stamp it.

Then I stamped the hearts (main card) in 2 different colours of Distress ink and then spritzed it with water and dried it. 

Finally I stamped the sentiment onto the card..affix to the card blank, add a little bling and it was finished.

I did the same with the other three stamps to make this cute set for my friend.

All of the hearts, stars, stardust and circles are by Simon Says Stamp and are from various stamp sets.

Here's a photo of the other cards..


I will totally be doing this again with this stamp set..

Fun times inspired by a fun challenge.

Cx


Saturday, December 5, 2015

Happy Birthday Daddy..


Hi,

So complete mess here..

A) I forgot to take a photo of my Dad's card in my haste to get it in the post

B) Said card has been returned to me, because according to Royal Mail my parents do not have a post box?!

Anyway...

Happy Birthday Daddy..I am looking forward to hanging with him in 2 weeks, as I will be in London and I'm having an early Christmas with my parents.

I love my Dad, he is awesome, a bit weird, sport mad, music crazy with a wicked sense of style and humour - I don't like being this far away from him, but in one sense it's cool because he sends me the funniest emails ever.

Because I don't have his card, I thought I would show the card I made for Anna the owner of The Inkpad NYC, she shares the same bday as my Dad, so it works :) She's also pretty awesome too and thanks to her and her wonderful store I have learnt a lot and made some cool friends.

Happy Saturday..

Cx

Thursday, November 5, 2015

Stencil playtime..

Hey,

So as you know I love stencils.

When my friend Denise was visiting she really wanted to have a play with stencils, so we broke them out and I ended up with 3 stencilled backgrounds.

I cut them down and ended up with 4 card sized pieces.

The main card uses distress stains and because they were quite juicy, I got the great blended effect that you can see. To finish off this card, I die cut the sentiment and heat embossed the happy.

The next 2 cards use the same stencilled background - a recent bargain find at The InkpadNYC - again using distress stains. I used a birthday stamp that the lovely Darnell sent me for my birthday and the Happy dies are by Wplus9.


My final card uses a fave Simon Says Stamp stencil that I have had for ages and this time I used distress inks in 3 colours to create a vignette of colour. I am a bit sad that my happy doesn't pop as much as I wanted it to..I might need to attempt a fix here..


I love playing with Stencils and the Online Card Class I did really helped me to use them in more varied ways.

Don't forget that you still have time to play along with the latest Moving Along With The Times challenge - Leaves and Trees. Challenge ends on Weds 11th Nov.

Cx

Sunday, September 20, 2015

NYC Playdate Part 1...


Hey,

So here I am in London, finally posting some of the cards that JT and I made LAST Sunday on our NYC playdate.

What a hoot that was - so much fun to have JT and her hubby here with us and for JT to finally get a proper play with my stash - how I miss the playdates we used to have when we were both in London.

The headline card is my fave out of this batch...

I used a fun technique of inking a stamp with Distress Ink and spritzing it with water and then you lay the paper ontop..

I then die-cut this using butterfly dies by Xcut. The sentiment is a freebie from Quick Cards that my Ma bought me - isn't it gorgeous!

The next card uses my new fave pineapple background stamp. I thought it went well with my new Avocado Arts Flamingo. The sentiment is by WPlus9. 

This card feels really Summery to me.


I bought the great new stamp and die set by Simon Says Stamp & Mama Elephant - Skater Kids. It is part of the special Stamptember releases and I wanted it so badly, I bought it online from Mexico!!

I love the fact that all the animals and shorts are interchangeable. The little skid marks are fun too. All the sentiments I used are from the set.

I kept the card simple to showcase the skating dog!


Final card in this epic post - using a great Simon Says Stamp die. I die cut it using 4 sheets of patterned paper by My Mind's Eye and a brown outline piece. JT and I got a set each and we pieced them together. 

I added another one of the great freebie stamps from Quick Cards and this card really does make me smile and feel happy.


I am so happy with all of these cards, can't wait to show you part 2.

You can see JT's cards here and here.

Cx

Wednesday, August 12, 2015

Tissue paper backgrounds..


Hey,

Recently, I saw this great idea for kids on Pinterest, it looked easy and fun, so I thought I'd give it a go.

I must point out though that they do point out the ink from the tissue paper will stain your fingers, so wear gloves. They are right. I did not listen, I have had inky fingers since Sunday...

Make sure you use bleeding tissue paper - not regular gift wrap tissue paper. I got mine from a cheapo store in London ages ago, but they sell it in most dollar stores.

The main photo today shows the hexagons I used for some of the backgrounds and a few of the backgrounds.

I did a few different things with the backgrounds.

I decided to cut an aperture in the background for these cards, I used a SSS stitched circle die, then I cut the SSS Smile die - which fits the aperture perfectly.

Both the backgrounds were cut out with a MFT stitched rectangle die.

I created a fun sentiment for the cards, but using a SSS stamp that worked with smile..


This card used the offcut from the cards above. This is an anniversary card for a special friend and her husband.. So I went to town a bit. I stacked punched hearts to add a bit of dimension. Because I did not have glittery purple card I decided to colour one of the hearts and then added embossing ink and sparkly Judikins embossing powder.

Love the faux glitter paper effect.


Final card for today is also an anniversary card. I love the giant Happy - the die is part of a trio by WPlus9.


I have some more cards to show you tomorrow using this technique.

Such an easy technique that gives such different results. I am looking forward to using different punches.

Cx