Showing posts with label stash. Show all posts

Thursday, March 26, 2020

4 cards, 1 stamp set: Making Cards Mag Freebie


Hey,

So having a little challenge gap day today :)

I wanted to show you x4 cards that I made using a freebie stamp set I got in the UK.

I love the stamps, they are a great addition to my stash.

I stamped x4 of the girls onto watercolour paper and used distress inks to colour them.

I decided that I would cut the main stamped images as tags and go from there.

I had a LOT of fun, I used so many scraps from my stash - including all the ribbon. Basically I never ever buy ribbon, I just save it from gifts I get given and recycle it in my crafting!

Fun cards that came out even better than expected.

Cx

Thursday, April 20, 2017

Craftgang March Playdate..


Hey,

I am a bit late posting these cards, especially as the Craftgang monthly meet-up is this Sunday!!

Jamey has a great craft studio space in Hoboken and once a month the Craftgang (there are several of us!) meet up to eat, gossip and make stuff.

It's also a great opportunity to play with everyone else's stash, especially Jamey's.

As I have mentioned before Jamey has the most awesome collection of background stamps and I always like to play with those when I am there.

I generally take NBUS with me, because then I get inspired by the gang and they can play with the new stuff that they might not have.

The main card today uses the Lawn Fawn Year Seven stamp and die-set. The background stamp is one of Jamey's and I stamped it and spritzed it to get a bit of movement. The small stitched rounded square die is also one of Jamey's - DO WANT.  I knew I wanted this card to go on one of my fave mini square craft blanks and so waited until I got home to assemble it.

The next card uses a great stamp set by Unity Stamp Co, it comes with several awesome sentiments. I think the bird is a lot of fun too and would probably make a great mixed media piece in my art journal. The background I stole from a stack of Oxide Distress Ink backgrounds that Jamey had previously made, it works perfectly here.


I am a bit obsessed with Reverse Confetti right now.. My friend Jen used the Later Alligator set recently and I had to have it!

I didn't buy the dies, so I fussy cut the Gator and the cake, both are coloured with Ava's Zigs, as I left mine at home! I used dies I found in Jamey's stash and some fun papers also from her stash. I added a few of the clear droplets by Pretty Pink Posh (the Craftgang liked these..) to finish the card off. I like the crazy mix of patterns and colours.

Final card today sparked much laughter, as I decided to use the teeny tiniest letters that I could find in Jamey's stash..it was an exercise in patience applying them!


This was the first time I had used the snail by Avery Elle and it was before the die arrived. The background piece consists of a die and a stamp again from Jamey's stash.

I love the variety of cards I get when we have a playdate and I also love all the food we eat!

Cx

Thursday, March 23, 2017

Reverse Confetti..Playing with new goodies..


Hey,

I won the February Reverse Confetti sketch challenge, which meant I got a $20 voucher..obviously I spent more than that, but now I have all these lovely new things to play with.

Here is the March Sketch -
I decided to rotate it to the left, it worked better for my idea...

I bought the Bearing Gifts set because I loved the Bear in the car and thought it would make excellent birthday cards.

I had this crazy idea to create a scene and would you believe it, it worked!!

I really liked the current theme over at The Male Room -


I thought I could combine the RC sketch and The Male Room theme...I love how the DT have used wood.

I hunted and found a piece of wood effect background paper in my ridiculously large paper stash and die-cut out using a Simon Says Stamp stitched die and in the same paper stack I saw the blue piece of paper that worked as 'sky' in my opinion. I die-cut that piece using a smaller MFT stitched die.

Then I stamped the trees onto a green patterned paper and fussy cut them out. I stamped, coloured and fussy cut the Bear (I don't have the dies..yet).

I spent a while laying it all out before the glue came out...no room for mistakes here..I didn't fancy fussy cutting anymore!

I love the end result and feel like the Bear is driving through the woods to deliver gifts!!

Always fun to combine challenges.

Cx


Friday, December 16, 2016

You Rock!!


Hey,

Happy Friday!

I thought this card was totally apt for a Friday :)

I made it last Friday when I had a mini playdate with some friends.

The YNS Silly Monster Rockstars stamps are mine and the background is actually a stamp that Jamey had - I LOVE it, it looks like a handmade background.

I masked off my Monster before I stamped the background and I coloured him/her with distress inks and an aquabrush.

Hope you have a great weekend, I am playing at my desk, brunching (in the snow?!), playdating with JT and watching NFL.

Excellent.

Cx

Thursday, November 10, 2016

Moving Along With The Times..Numbers or Letters...


Hey,

Welcome to another fun Moving Along With The Times Challenge..

This time our Hostess is Judith and she wants us to use die-cut letters or numbers.

I made my card in October when I was at JT's house having a playdate. So none of the items you see on my card are mine - love playing with someone else's stash.

I used a great woodgrain background stamp that JT has and I inked it up with 3 different distress ink blues and spritzed it with water before laying my paper on top.

I love doing this, you always get a great effect and its a total surprise!

I decided that a word banner would work well and rooted through JT's stash and came up with this awesome Die-versions Cheers banner. I die-cut it in a coordinating colour and secured it to the card using mini staples.

It felt a bit bare, so I added some punched stars and some blue bling.

It has already left my desk and is winging its way to a friend.

Show us your creations, but first hop on over to MAWTT and see what the rest of the DT have been making.

Challenge ends on November 23rd at 1pm GMT. You can enter 3 times.

Cx

Monday, November 7, 2016

Exciting news...


Hey,

Happy Monday everyone.

So remember last week I said I had exciting craft news?

Well I made the Sketch Saturday Challenge DT - YAY!!!

I couldn't believe it when I found out 2 weeks ago, I love sketches and I have played along with Sketch Saturday a lot. So I am super excited to be joining this talented team.

So to celebrate this great news today I am playing along (but obvs not entering!) with the current challenge.


This week's sponsor is Digi Stamp Boutique, they are offering a £10 gift certificate.

I used one of the images from the Bailey Reindeer set and coloured it using Zig Clean Color brush pens.

The floral paper is by American Crafts and is ancient and I don't have much of it left, I paired it with a co-ordinating green square. I added a thin piece of red ribbon for a bit of extra interest and finished off with a snowflake and wooden heart.

The sentiment is by Papermania and both my stitched circle and square dies are by Simon Says Stamp.

I love it, such a sweet image.

Hope you will play along too challenge ends on Friday 11th of November and I'll be back on Saturday 12th with my first DT make for the team.

Cx


Wednesday, October 12, 2016

Playdate part 1..


Hey,

So last Saturday as I was in London in the evening, JT and I had a great opportunity to have a long overdue face to face playdate - YAY.

I had seen this great video by Jennifer Maguire and really wanted to try it out.

The idea is to mask an image and stamp a sentiment over and over again. Genius and obvious!!

My main card uses a Clearly Besotted sentiment, stamped in black and a great yellow ink I found in JT's stash (LOVE playing with someone else's kit!). The bird is a freebie that we both have.

The next one uses the same stamp set that JT used, but a different sentiment and a bee stamp that we also both have (JT bought it for both of us). I finally got to use glossy accents to 'accentuate' something...don't ask!!


Fun times man, there are more cards to come in part 2 - later in the week, as tomorrow is MAWTT and hosted by JT!!!

Cx


Saturday, October 3, 2015

Wooden it be nice..


Hey,

Happy Saturday!!

Its pretty rainy and windy here in NYC due to Hurricane Joaquin, perfect excuse to stay in and play at my desk.

I came across the Shopping Our Stash challenge during the Summer when I was on a challenge hiatus..but that is over now, so this is my first time playing along.

The theme for this week's challenge is 'Wooden it be nice' - essentially use wood on your project.

The minute I saw it, I thought 'Now I can use that pair of glasses that have been sitting on my desk for 4 months...'

I thought they would go really well with the Hippo from an Avery Elle stamp set (Hipsterpotomus) and I think I was right :) I coloured the hippo using Promarkers and added the glasses using UHU.

The sentiment is from the small talk set by Mama Elephant.

I decided to keep him nice and CAS.

I love him, I can't wait to send him to someone and its given me some ideas about some other wooden items hiding in my stash.

Cx

Friday, October 2, 2015

Friday Challenge Time...


Hey,

Happy Friday.

As you know I had a Summer challenge break and I have been slowly easing myself back in..

One of my fave challenges is Freshly Made Sketches and this week's sketch (#206) and DT inspiration made me rush to my desk to have a play, so I could enter..

Here is the sketch -
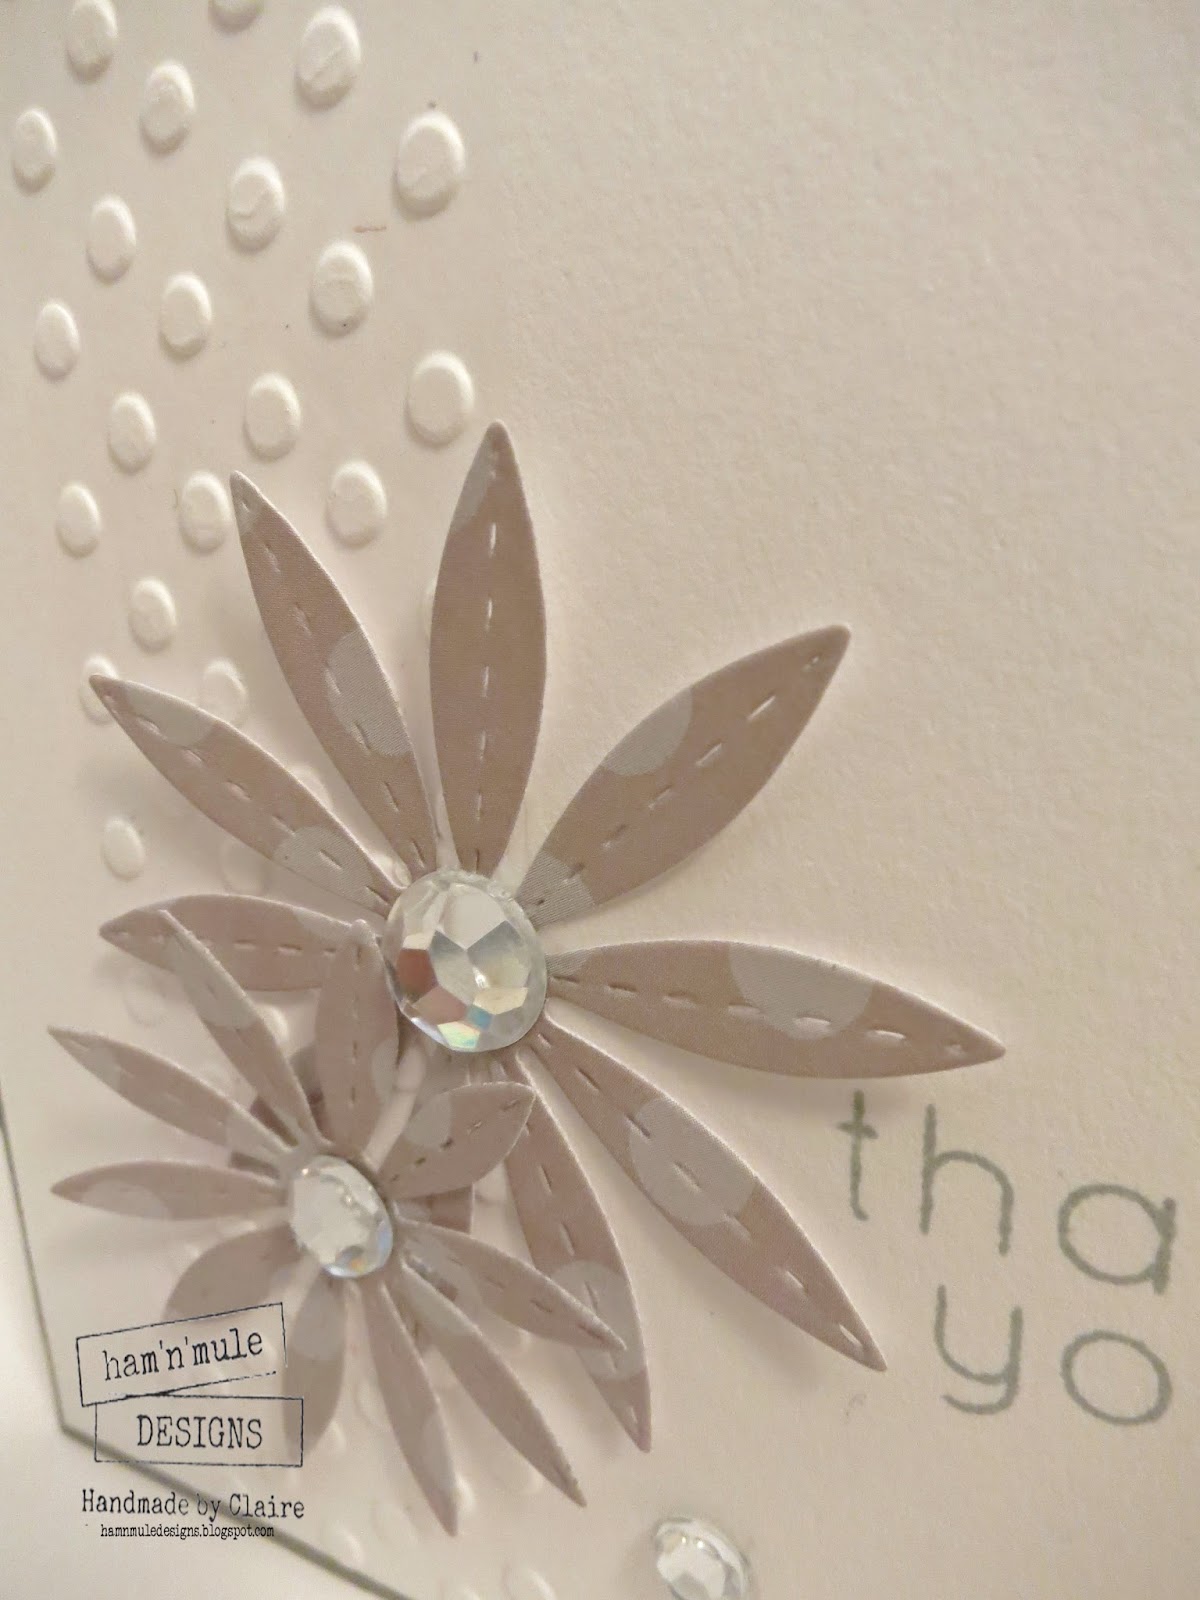
I recently bought a set of great stitched flower dies in the Simon Says Stamp Stamptember releases..I love them, but I didn't get a chance to play with them before I left for London.

So I broke them out for this challenge - yes they are NBUS! Initially I was just going with the flowers and a sentiment, but it felt flat, so I got out a Darice spotty embossing folder (it's a strip) and voila! life was breathed into my card.

I loved the outcome so much, I made 3..


A close-up, so you can see the stitched flowers...

Ingredients:
SSS inks 
Papers - American Crafts and Lidl (Lidl is a supermarket in the UK...)
Bling by Michaels
Sentiments by Simon Says Stamp and Paper Smooches.

Hope you all have a great weekend.. Hubby and I are off out with JT's godparents tonight..tomorrow night we are heading out with friends to keep on celebrating my birthday LOL.

Cx


Wednesday, September 16, 2015

Birthday shakers..


Hey,

Continuing on with my shaker 'series' I have a couple more fun cards to show you today.

These are a bit different as I used a Lil' Inker birthday die as the feature and the shaker aspect is kind of secondary.

I really love this die, one of my MAWTT colleagues used it a while back and I had to have it.

These cards were super simple to make, thanks to the Fuse. I added some glitter to my shaker mix for the blue card - not sure how I feel about this, I don't like the way it sticks to the shaker pouch..thoughts?

Here is another colour for you and a close-up of the blue one. Both papers are ANCIENT and have been in my stash for at least 5 years!!!

Pink birthday shaker
Close-up of the blue shaker
Cx

Wednesday, April 22, 2015

WOYWW #307..My craft room exploded...


Hey,

Happy WOYWW.

My craft room didn't really explode it just looks like it!

I'm showing you my desk because it's that fab time of the week where we get to join the lovely Julia over at her blog Stamping Ground and have a global desk nosy..

My desk photo was taken around 11pm on Tues evening. I got home at about 9.15ish after a dinner date with Hubby (yummy burgers at Umami Burger) and got straight to work at my desk.

I wanted to finish my April tags for the Tim Holtz 12 Tags of 2015 and some Mother's Day cards that need to get delivered this week!

You can see my new die storage system. I was looking for a die and realised I needed to take a photo of my desk, so multi-tasked (I am a Project Manager after all).
The binder is supposed to be a recipe binder, it came with a lot of fab pockets, which make perfect die storage. I cut down the dividers to use in the extra pockets I bought (the blue gingham paper you see is the dividers) waste not, want not! The whole thing cost $9 including the extra pockets - score! America based ladies the binder came from Burlington?!

I popped into my local craft store on Monday and went a bit spendy, spendy, but the good news is that I also signed up for a Mixed Media card making class in 2 weeks.

I've labelled the rest of the mess items for your pleasure!

Here are a couple of fun cards that I made for OWH, there are 8 of them in total in a few different colours.


Thanks again everyone for the lovely kind words about my broken foot (you guys are the best!). It is on the mend and I am now as slow as a retired Greyhound!

A special shout out to Darnell, who sent me a wonderful card to help me stop wallowing in my own misery - I mean it was my fault after all - the wall doesn't move!

Cx


Friday, December 12, 2014

CASE..using feathers..


Hey,

So today I am showing a card that I made as a CASE of this beauty I saw on Pinterest..


I was inspired by the little pack of feather die-cuts that JT sent me, she recently purchased gorgeous xCut feather dies and kindly die-cut several for me.

I decided to heat emboss my splatter using a Memory Box texture splatter stencil and embossing powders by WOW! (Red) and Ranger (Liquid Platinum).

The sentiment is by WPlus9 and I used a VersaMagic ink. For the final touch I added some red bling.

I really like how my CASE came out, Pinterest is giving me lots to CASE at the moment...it's fun after the Christmas card frenzy!

Hope you have a good weekend.

Cx

Thursday, December 11, 2014

$20 Challenge...


Hey,

So as some of you know JT and I love to play $20 challenge.

Not familiar with $20 challenge? Well, the rules are very simple. 

You can spend $20 on craft stash for the other person we have to buy each other $20 of craft goodies - ideally you should choose things that you think the other person might like and might not buy. Finally you agree some parameters - we did stars, spots, stripes and dies this time. Bargains are also a big part of the challenge.

I have already received mine from JT - hers is going in the post, as I have been waiting for an item to arrive..

So what did I get?

What didn't I get more like!! Stamps, ribbon, stickers, journaling cards that can be used as stencils and a die set!. Love the little notes and I can't wait to have a proper play with it all.

Amazing right!

Great choices from JT - especially the treat Dinosaur stamps - I LOVE Dinosaurs!!

Cx


Wednesday, December 10, 2014

WOYWW #288 - Stash crazy...


Hey,

Can you believe its that time already?! Yes, its time for WOYWW. Time to join our wonderful hostess Julia over at her blog Stamping Ground - for the weekly global desk nosy. Hang out with old friends and make new ones - I love WOYWW.

My desk show and tell this week is all about the first of JT's two stash gifts to me! The main photo is of all the stuff she brought with her from the UK.

I labelled the photos, so you can see what's what, thus this post is not as long!

Here is a shot of the twine, so you can see all the yummy colours.


Last week, you saw a sheet of adhesive dots on my desk and I said I would tell you all about them. Well, they are from Tesco, they are for 'office' use, but I like to use them under bling, for some added detail. I also use them as borders and on cupcake die-cuts as 'sprinkles'


Here is the card I made for my wonderfully talented DT colleague and friend Sue -


You can see one of the red dots under the red pearl. I love this card and I took a close up of her hair, as I blended 2 colours well here! I love Gorjuss stamps, such fun to work with.

See you at your desks later. I'll be home at a decent time, as tomorrow is my work Christmas Party..

Cx

Monday, December 1, 2014

Playing with my stash...


Hey,

Hope everyone had a great weekend.

If you are based in the US I hope you had a great Thanksgiving.

I spent most of Saturday playing at my desk.

I decided to play with some of the more mixed media elements of my stash.

I broke out stencils, Ferro metallic paint/paste stuff, distress paints and my heat embossing stuff.

I made 3 cards, each using different techniques and materials.

The main card today is my fave. I went with stamping and heat embossing for this one.
I really love the colours and the fact that it's the first time I have ever got this uber detailed tree stamp to work (by Papermania 'Birdsong').
My colour scheme started because I came across the sheet of MME paper from a SSS card kit I have, it made me feel all Autumnal..
So I stamped the tree using Red Brick VersaMagic chalk ink - not a normal ink for heat embossing, but it worked. I used a clear embossing powder so the ink would show through. The sentiment is stamped with the same colour ink. I added a couple of pearls and some bling to the left corner to anchor the whole thing.

Card number 2 - Stenciling with distress paints...


A few weeks back I got a ton of distress paints in the sale. Having never used them before I surfed around for ideas for my first attempt. I settled on stenciling, seemed like the easiest way to get to grips with them.
I used a SSS mosaic heart stencil with Fired Brick and Spun Sugar distress paints. I totally love the way it came out, it's a bit messy, but it makes it a bit edgy I think. Because of this I added the You Rock sentiment and now it's going to be used as a birthday card for my friend who is an Art Teacher.

Final card - Stencil, texture paint/paste and heat embossing on to vellum...


So I bought the Ferro metallic paint/paste stuff a while ago, so I could finish my card course on stenciling. But to be quite frank, when it arrived it scared me a bit!
I had a play with it using a Memory Box texture splatter stencil and forgot all about it...
Then I stumbled across it this weekend and wanted to use it somehow. I heat embossed the Dear Lizzy sentiment onto vellum, which I then die-cut to shape. I chose the vellum so you can see parts of the texture underneath.
For a final touch I added some MME spotty washi tape and used a piece of solid tape from the same set to secure the vellum sentiment circle to the card.
I think this card should be used as an Anniversary card - bit weird, but I figure I know just the couple..

Playing with my stash was fun and gave me so many new ideas - my notebook has been out a lot this weekend. Note to self - do this more often!

Cx

Wednesday, September 3, 2014

WOYWW #274...sick as a dog...


Meh..I am a bad patient. I have had a rotten cold, that has turned into a chest infection..so I am moaning and blah.

Anyway onto happier things - WOYWW..yep one whole entire week has passed and it is time to join Julia and the gang over at Julia's blog Stamping Ground for the weekly desk nose.

So my desk is quiet after an action packed weekend of crafting..there was supposed to be sewing done, but I realised I was missing the right coloured threads. On my desk you can see, my most fave thing - my notebook..if I lose him I will literally die, new stamps, stencils and embossing folders that were on sale and are mini and perfect for OWH. T-rule..I love this newish addition to my kit, cards for posting, a distress ink blending tool that should have been put away, a try out of new sparkle embossing powder - more practice needed and ME!

Here is a pic of what I should have been sewing..Ma bought me x2 new tops, but because of my large boobies, they didn't fit, so cue modify / enlarge mode - cut out x3 panels (sides and back) and insert contrasting lace..

Refashioned top
Just need the right colour thread now.

To finish up this week here is a Thank you card, made for the Mr & Mrs at the second wedding. The lettering is a Tim Holtz Sizzix die and all the papers are scraps - yay me!

Wedding Thanks
Their colours were red, white and black and I love that giant red pearl!

Happy WOYWW everyone see you in the comment zone later :)

Cx

Wednesday, August 27, 2014

WOYWW #273..Back at my desk..


Hi WOYWWers!

Hope everyone is well. I am TIRED..got back to NYC on Monday night and went straight back to work on Tues AM..so I'm a bit blerugh!

Before I continue with today's short post (no card this week) - want to know what WOYWW is? Then visit the lovely Julia's blog Stamping Ground and join us crazy global deskers.

Just check out all the yummy stash I came home with...free magazines galore, a cheeky craft superstore order (incl new Gorjuss stamps), gifts from my Ma and JT and some bumper bonus bits and bobs from The Works and Poundland :)

It was fun to see all our peeps..the wedding on Sunday was amazing..they had Flamingoes in the roof terrace pond - AMAZING!!

Flamingoes..7 floors up!!
Hubby and Me!
Me with the gorgeoys bride Lindsey
That's all folks - I'll be visiting after work.

Cx

Friday, June 13, 2014

Winning goodies...


Hi,

Happy Friday to you!

So a couple of weeks ago I won the May Sweepstakes on the Papercrafts Mag website.

This is my prize -

Goodies!!
What's in this bumper prize? Chalkboard 12x12 papers by DCWV, a pack of Chalk It Up papers and Gone Typo stickers by Hazel and Ruby, Stampin'Up markers, a white gel pen, a stampers big white pen by Faber Castell, some chalk markers and a modern calligraphy book. AMAZING!!!

Then...on Wednesday, I won the I Love Promarkers challenge and got 2 free digi Stamps from Doctor Digi..

Whoop whoop!

I saw a masking technique in the Modern Calligraphy book, that sparked an idea..

First I cut small rectangles of watercolour paper (thanks Mr & Mrs Nixon), then I masked off a portion of the paper. I stamped 2 different leaf stamps using Versamark and then heat embossed using white powder.

Heat embossed images
Sorry for the photos, I took them at night as I was working :) The brown shiny thing is my craft sheet, if you haven't got one of these get one, you'll see why next..

I then chose to use 2 different techniques for watercolour resist. The first one looks like this -

Watercolour resist technique 1
I dabbed 3 Ranger Distress inks on my sheet (Peeled Paint, Peacock Feathers, Spiced Marmalade), then I spritzed them with some water. Turning my paper so the embossed image faced down, I smooshed (its so a word) the paper into the inky water. You get some drips, but that's fine, its the variation in colour I wanted. I dried them using my heat tool. The best bit is you just take a wet wipe and wipe away all the inky mess off of the sheet!!

The next technique is less messy and you don't need the sheet really, but I like working on it.

Watercolour resist technique 2
For this technique I got out my watercolour palette and spritzed some water on the sheet, dabbed my brush in it and got to work. The colour is more even and you don't get a stripe in the middle of your masked area..

I decided not to clean up the messy masked area on the green ones and used it as a feature.

Here are the other 3 finished cards.

Watercolour resist cards
A fun Wednesday night celebration project. All the papers are by American Crafts and here are the other things I used.