Showing posts with label mexico. Show all posts

Friday, October 25, 2019

Cards for Colleagues..


Hey,

Happy Friday!

Tomorrow Hubby and I leave for Mexico - WHOOOP!! So excited, can't wait to feel the sun on my body again. Summer seems to have gone by so quickly.

I thought I'd show you a batch of cards I made a while ago for a few of my colleagues in the London office.

The first one was a leaving card and the colleague in question loves a Llama. I forgot all about the great wooden Llamas that I had bought in London earlier this year and it seemed like the perfect time to use one. I kept the card simple. The sentiment is by A-Muse Studio.

The next card is for a colleague who got promoted, she has a French Bulldog, so I thought she would appreciate the headphone wearing dog. Again, kept super simple with a negative die-cut out by Tim Holtz.


The final card was also for a colleague that was leaving - yes you guessed it, she likes Cats! The stamp is from the same set as the dog above and I added the great self-adhesive sunnies! The sentiment is by Simon Says Stamp.


3 really simple, but impactful cards.

Have a great weekend. I know I'm gonna!

Cx

Monday, September 11, 2017

Mexico 2017...


Hey,

Short and simple post today.

Just saying Hola! Following our return from Mexico and showing you photos of us, generally enjoying ourselves and Freddie Flamingo makes an appearance too.

We had a FANTASTIC time and it was just awesome to spend QT with Hubby.

Sad to be home, but it's always nice to know we have next year to look forward to.

Cx


Sunday, September 10, 2017

Week 1: The Daily Marker 30 Day Colouring Challenge...


Hey,

Happy Sunday!

Hubby and I are happy to be home as we have the start of the NFL season to console us, but we REALLY had a great time in Mexico and were sad to leave yesterday.

I thought I would show you a mini collage of my week 1 colouring for the current The Daily Marker 30 Day colouring challenge.


As I was going to be away for the first week, I wanted to keep it simple and compact for traveling. So I decided to use my new Zoophabet by Penny Black and combine it with Jenny Bowlin outline stamps to create the words that matched the images in the Zoophabet.

See the top left image in my collage for what they look like before I colour them in.

Fun right?! My only complaint is that it turns out it's not really a Zoophabet and I don't understand why..why not use Giraffe for G and Hippo for H?!

Anyway, it's all been fun to colour and as you can see I added some background elements to all of the days to make them a bit more fun.

If you have never played along, you really should, its so much fun to colour everyday and see what the rest of the community are colouring, totally inspiring.

Also just wanted to say, thinking of Floridians right now, be safe wherever you are and remember your life is more important than stuff, stay safe.

Cx

Thursday, September 7, 2017

Freebie Birthday...


Hey,

I actually made today's cards ages ago, but have never got around to posting them.

I got the amazing die free with a UK craft magazine.

I added some distress ink to my craft sheet, spritzed it with water and then smooshed the die-cut piece in it, I love the various shades and tones I ended up with.

Made sense to keep these simple and just adhere them to mini kraft card blanks.

I also made it in orange..


Love it when a simple idea looks so good.

Cx

Wednesday, September 6, 2017

Christmas Card 2017: Newton's Ornaments..


Hey,

I loved this set by Newton's Nook - Ornamental Newton and so when I got the chance to buy it on sale, I totally did.

These cards were so easy to make.

I die-cut the red and blue panels and trimmed the kraft card blanks to size, I wanted mini cards. For some reason I think Christmas cards are better in miniature..

I watercoloured all of the ornaments and before affixing them to the cards, I stamped the sentiments. I mixed and matched, because Holiday only resonates with my Americans. And as I haven't counted the list yet, I didn't want to make all of these US focused.

I affixed the image to the card using coloured staple and then added some gold stickles.

Love this batch of sweet cards.

Cx


Tuesday, September 5, 2017

Retro Rubber Challenge #70..Back to School..Still time to play..


Hey,

There is still time for you to play along with the current Retro Rubber challenge.

This time we have a Back to School theme for you..

I am not playing along, as I am in Mexico sunning myself!

Go over to Retro Rubber and check out the fun things the DT have made.

Challenge ends September 8th. Don't forget to use a stamp over a year old and tell us the age of it, that is part of the fun of our challenge. and please only enter 10 challenges including Retro Rubber.

Cx

Monday, September 4, 2017

Obviously More Monsters...


Hey,

Happy Monday from Mexico (kind of)...

I recently bought the new MFT More Monster stamps and dies...you know I LOVE Monster stamps.

I couldn't go away without having a little play, but as my time was limited I kept the cards simple.

A very long time ago I bought a stack of coloured paper squares from Michaels and it is still going strong and the best thing about them is that you don't have to trim them to size, if you use mini square card blanks.

I stamped all the monsters using the MISTI and then added all the details (eyes, mouths etc) that are separate stamps. Very efficient.

All the sentiments except RAWR (by Your Next Stamp) are from the same set as the monsters..

Super simple and quick and makes for a fun set of cards.

Cx

Saturday, September 2, 2017

Margate Craftathon 2017: Part Four...


Hey,

Happy Saturday - I am probably in Mexico as you are reading this.

Nearly there with the Margate series of posts..just a couple more to go..I mean this is what happens when you make 24 cards!

Today's post is all about stencils.

I took a load as did JT and we mixed and matched and played with different techniques.

Main photo was to show JT what her new pot of Glitter paste would look like - sparkly is what! I love Glitter paste, its amazing.  The thank you die is JT's and I had to buy the set when I got home, because I used it SO much over that weekend (she's lucky I didn't pinch it!).

Below I used a different stencil - Dina Wakely - and just a mustard seed oxide ink. Simple, but so wonderful.


The final card didn't photograph as well as I had hoped. I used texture paste through a Tim Holtz leaf stencil and then blended over it once it was dry. The sentiment die is from that set that JT brought with her..

Fun to play with stencils, I am still slightly embarrassed by how long it took me to get the hang of them and now they are used all the time!

Cx

Wednesday, September 14, 2016

Choose Happiness..


Hey,

This is my first live post, since I got back from Mexico.

I wanted to share the card I made for a client who has become a friend. She is going through some hard stuff right now and I wanted her to have something 'empowering'.

Whilst in Mexico I realised that I have to remind myself - rough days are fine. It's ok not to love every day :) And the sentiment here by Unity Stamp Co. triggered that thought before I left as it was the last thing I made.

I love the stencil I used on this card, it's new and by Balzer Bits from TCW - I love these mini stencils from Julie Fei-Fan Balzer, they are awesome to play with.

I used 3 distress inks with finger daubers on this card and just kept blending until I got the bluey green I wanted!

I die-cut it using a Simon Says Stamp stitched square and popped it up with foam pads on a kraft square blank (again JT giving me swoony card blanks).

Such a simple card to make and now I want to play with the stencil more..

Cx

Saturday, September 10, 2016

Distress Star...

Hey,

So sadly today is the last day of our Holibobs in Mexico - boo!

Back to reality and furbabies later on tonight.

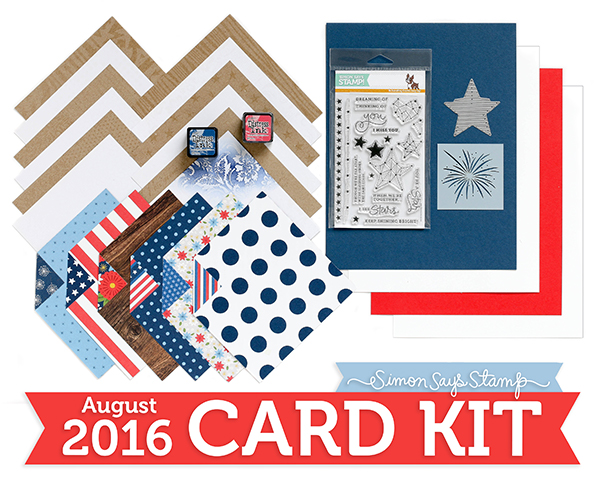
I saw this great card by Laura Bassen on the August Simon Says Stamp cardkit sheet.

I loved the star and wanted to have a go..

I blended 3 colours onto a piece of card and then using the star die from the kit, die-cut the star, you have to cut around the edges to get the border. It came out so well!! So pleased.

Because I already had the yellow WOW! embossing powder out (see yesterday's post) I decided to stamp a Concord & 9th sentiment and heat emboss it.

A fab card for one of the ungrateful Male recipients in my life (I send them stuff, even though I know they don't care..)

Cx

Monday, September 5, 2016

Paste Congrats...


Hey,

Happy Labor Day!

I am in Mexico with Hubby this week, so my posts are scheduled.

I like holiday post time, because I get to show you things that have been languishing on my camera for a while LOL.

Today's card hasn't been hanging around too long.

I need a congratulations card for a colleague and I wanted to make something a bit different for her.

I used my new fave Dutch Doobadoo Fan stencil with some texture paste and once it was dry, I die-cut it to size using a stitched rectangle die.

The little border dies were cut using random scraps of paper and they are new because when I was last heading home JT asked me if I needed anything as she was doing a Craft Superstore order..I didn't 'need' anything but these awesome dies were on sale... She kindly bought them for me as a gift, but she was a bit ambivalent about them..

I really like them and thought the 3 I chose to use here worked really well, I secured them to the paste panel using mini staples.

I thought I had a couple of congrats dies to choose from, turns out I totally do not, I only have the one you see, which is nice, but was not what was in my head (cue purchase of new die). This one is part of a Simon Says Stamp set that I love  (don't think they sell it anymore), but I was thinking of a chunkier die here.

Anyway, I love the end result, leaving the paste as it is makes everything else pop and the random mix of colours and patterns in the border dies is fun.

Cx


Sunday, September 4, 2016

Happy Anniversary...


Hey!!

From Mexico (kind of)..

Today is the lovely JT's wedding anniversary..

So I am hoping that a) she is out celebrating and not reading posts and b) my card has turned up..

JT and her hubby and good friends to me and my Hubby, so obvs I pull out the stops for their anniversary card..

This year I decided to use a set that I bought for both of us (the Avery Elle bunny) and the 'magic' die that JT bought me (she has it too..)

I printed the sentiment out on my computer and die-cut the panel with a stitched rectangle die..I just about left enough room for the die-cut magic to fit on.

I coloured the bunny and die-cut him out and popped him out using foam dots.

I added some bling as a finishing touch because a) why not and b) it's for JT!!!

Purple was their wedding colour I believe, so I chose that as my accent colour here. I like the fact that the bunny has bling in his bow-tie!

Happy Anniversary crazy dudes, hope you have a great day..I'll drink a cocktail or two for you...

Cx

Friday, September 2, 2016

I love stripes...


Hey,

Happy Friday...

Hubby and I are off on our holibobs to Mexico tomorrow - YAY!!

So continuing on from Thursday's post I am showing you more of the cards I made using the Stampin' Up brushstrokes stamp, distress inks and a spritz of water.

I made tons of these backgrounds last week, I found it very therapeutic after a busy day at work!

I also have a big thing for stripes and this stamp was NOT cheap, but I had to have it...

I love the main photo today, so simple, but really impactful - I added a strip of red paper to my cardstock and then added the stripey background slightly over that.

I have a safety pin that has scraps of ribbon attached to it, hanging from my pinboard and I found the red ribbon there.

I stamped the sentiment after adding the ribbon, as I couldn't decide what it should say...

The 'It's your day' stamp jumped out at me and works really well here, it's from Birthday Bisque by Jillibean Soup.

Obviously I made another card using these fun backgrounds..


This one was super simple and the brushstrokes background was smaller - no trimming, I trim all the watercolour paper to size before I go crazy with the ink and the spritzing! So they look really natural.

I love these textured card blanks and I can ONLY buy them when they are on sale..

I die-cut the Ellen Hutson 'Treat Yo Self' in a contrasting blue and popped it out with foam tape.

Whenever I use this die, I stamp '..it's your birthday' inside..

I love making backgrounds, so much fun and super handy for when your mojo escapes you.

My posts will be scheduled for the next 10 days whilst I recharge my batteries with my boy, cocktails, good food and sunshine.

Cx


Thursday, September 1, 2016

Love / Hate Relationship..

Hey,

Welcome to September..

Today I am playing along with the fun challenge over at CAS-ual Fridays -


Black, white + one other colour.

Bizarrely I had finished making my entry when I saw that JT had also entered..we are way too in sync.

I decided to break out a set that hasn't seen ink yet..naughty naughty, but I love this range of Hero Arts and Kelly Purkey stamp sets. I have the Seattle one too and I want the rest of them..

I have this love / hate relationship with NYC. I love living here (summers, iced coffee, doughnuts, the inkpad, walking everywhere..) and I hate it (lack of manners, subway, smell, tourists everywhere, winters..) all at the same time. This week is a love affair week - summer, rooftop bars, mimosas, brunch..

I kept my card really simple, just stamped the images from the set (and an Apple by Avocado Arts) onto a die-cut white panel. I added the other colour to the heart in my sentiment and I like that teeny tiny pop of colour..

Super simple and I might make a set of them as a little gift for someone.

Counting down now, two more working days and then Mexico here we come...

Cx

Friday, August 26, 2016

Constellations....


Hey,

Happy Friday.

I thought I would show you some fun things I made last weekend.

I had a fun time CASEing the wonderful cards that Debby Hughes made using the August Simon Says Stamp cardkit -


I ADORE Debby's work, she is so talented and I have learnt a lot watching her tutorials and reading her blog.

This cardkit threw me a bit, so having inspiration was helpful.

The technique to create the circular blue constellation pool looks like it would be complex, but it was infact very easy.

I punched a large circle out of a piece of scrap paper, I figured that this would help me decide where the blue circle should go and would help me stay circular when painting.

I pretty much followed Debby's instructions - heat emboss the stars in white onto my white panel, so they resist the blue watercolour. Like Debby I used Chipped Sapphire distress ink for the blue and I dug out an ancient silver watercolour pan to create the accents.

I kept drying and pooling more ink into the circle until I achieved the look I was happy with. Also because my silver watercolour is shimmery, the whole circle has a shimmer to it close-up - accidental bonus!

I don't have a white gel pen that I like :( so I used a white chalk marker to add little dots and I stamped stars in a Versafine Majestic Blue ink, so they were visible, but not leaping out at you.

I finished 3 of them in a similar way to Debby, by using a kraft background paper, twine and a star.


This one I finished differently -


I thought because of the heart constellation it would make a nice unusual Anniversary card and so I used a sentiment from Unity Stamp Co. and just rounded the corners of the white panel and the card blank - simple.

I love them all, they were so easy to make, yet look like oodles of time and effort went into them..more of these..

Have a great weekend, I will be packing..1 week until MEXICO!!!!

Cx

Monday, September 14, 2015

Fashionista..

Hey,

Bit late to the party today :).

I am back from Mexico - I am still off, as JT and her Hubby are in town hence the late post, we got to hang out with them yesterday and today :)

I made today's card for JT - I thought she would appreciate the sentiment.

As the stamps I have used are NBUS, I thought I would join in the lovely Darnell's 5th NBUS challenge.


The stamps are by Unity Stamp Co - they have this great range of Fashionista stamps..this is my first set, but I predict more in my future.

I coloured the card using distress inks and an aquabrush and Promarkers. It felt a bit flat, so I inked the edges with a distress ink - feels much better now.

The sentiment circle is an Simon Says Stamp die.

See you tomorrow for Retro Rubber #23

Cx