Showing posts with label competition. Show all posts

Wednesday, July 17, 2013

WOYWW 215...Belated win..


Hello and Happy WOYWW to you all..

Hop over to Julia's blog Stamping Ground to find out all about WOYWW the weekly global desk nose.

I know it is hot in the UK, but DUDES!! What is up with this heatwave, it topped 39 degrees here in NYC today..delicious and horrific all at once..

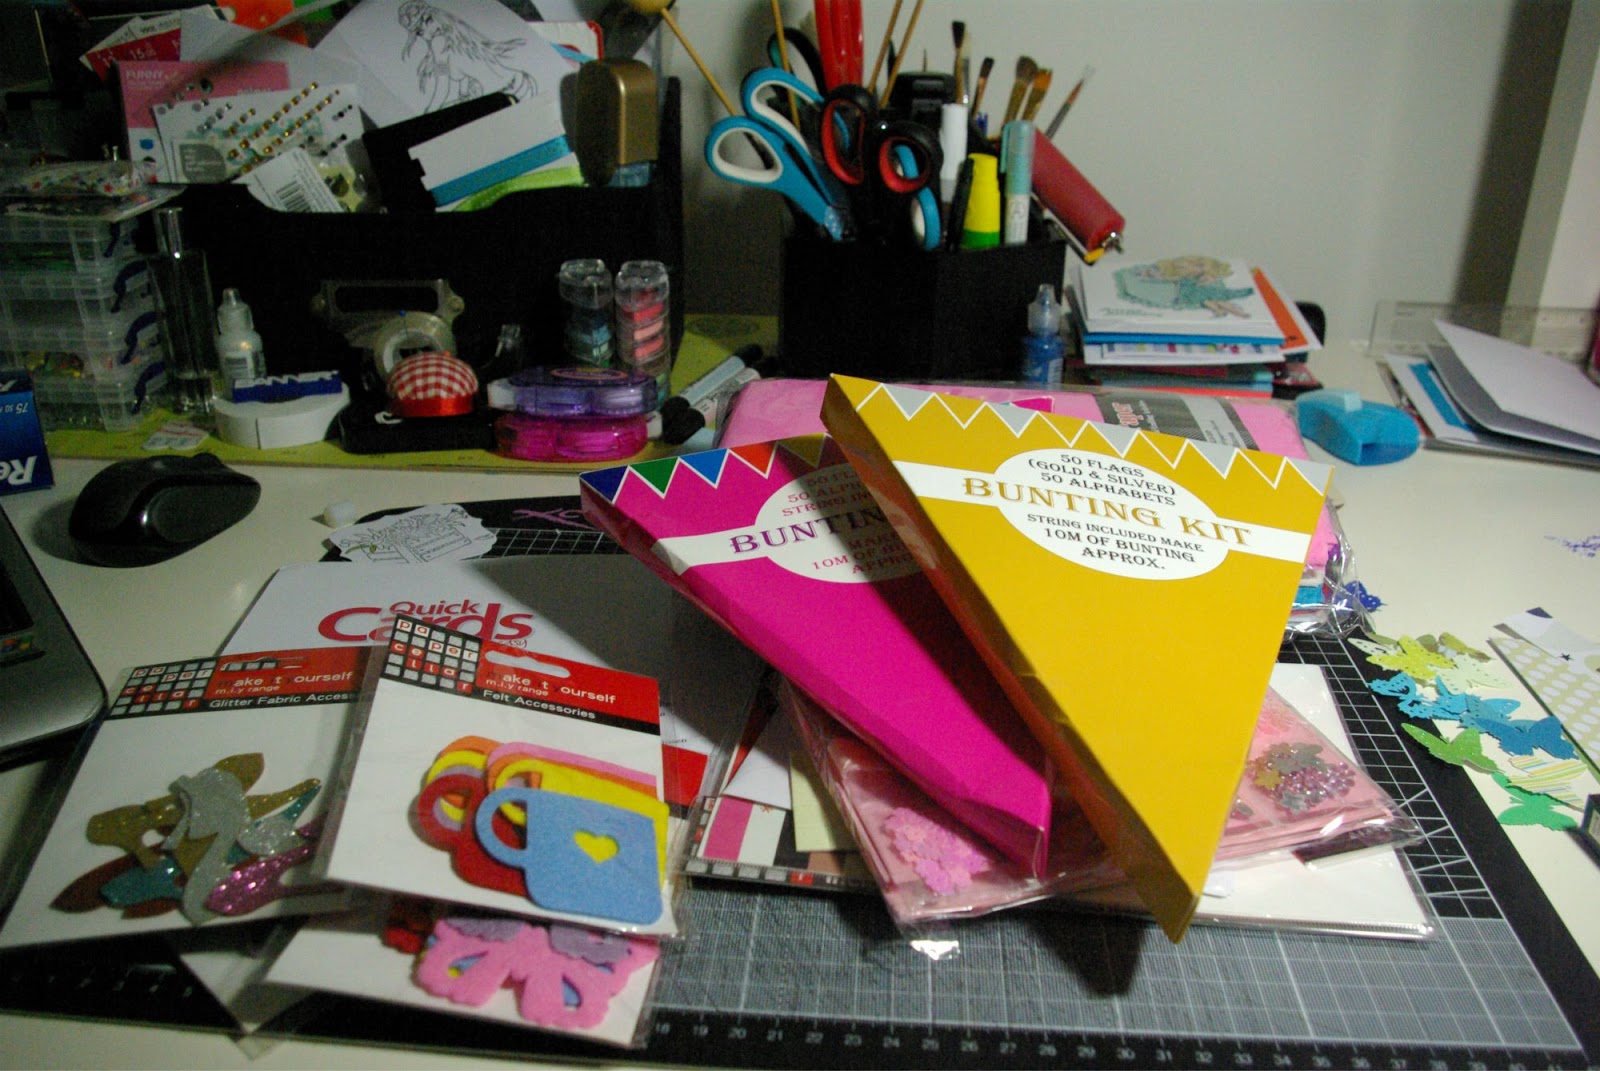
With the return of Hubby came the prize I won for entering a competition in Quick Cards earlier in the year. My Ma had the prize and gave it to Hubby to bring home for me. Lots of lovely new goodies to play with and here they are on my desk. I got x2 bunting kits, tissue paper, crepe paper, a pack of card blanks, a box of blingy embellishments and a whole variety of felt and glittery embellishments.

The competition required you to make a kids party invite - here is my winning invite -

Robot Invite - Front
Robot Invite - Back
The funny thing is that I wasn't going to enter it as I didn't think it was good enough...but Hubby convinced me that it was good enough :) The other good thing about winning was that the letter from Quick Cards said that they had, had 100's of entries, but felt mine was the best one - how awesome is that!

And for those of you that are interested the Robot Stamp is by Lettering Delights..oh and can you spot the non deliberate error?!

I'll be nosying around at desks when I get back from work.

Cx

p.s here are links to the dressform cards and camera cards that I made with the stamps you all loved last week.

Monday, April 11, 2011

I Got Published!!!


Whoo Hoo!!

Yes, you read it right!

I came runner up in a subscriber's competition in Cardmaking and Papercraft!! They asked subscriber's to send in a 'Thank You' card and I was one of the 2 runners-up.

My card is at the bottom, with the blue flowery background and the bird (from Bugaboo Stamps). Here is a better pic of the actual card -


I am really really pleased, it means I am published and I am getting a heap of cardmaking goodies.

I found out on Saturday, what a fantastic start to the weekend, which I spent in the craft room making lots of lovely cards.

Yay!

Cx

Tuesday, July 27, 2010

Not enough hours in the day!

Hello!

Sorry for the absence, last week was properly mental - what with Hubby's birthday (= drunken affair), work and craft fair activities - I really didn't know if I was coming or going.

Anyway, I am a tad sad today, as I only had one entry to my competition - RHR you win the pincushion, please email me your colour choice! No matter - it's all a learning curve and I will just have to figure out how to promote myself better!

So I had a nice busy crafting weekend - I made one of the aprons ready for Sunday's Christening BBQ. I am so pleased with it, I got the pattern from Taly's Creations - she kindly let me mention her here. I hope you can make use of her really straightforward tutorial and make your own apron. I will take a pic and show you my ones - but need to take the pic during the day, they come out much better that way!


Union Jack quilt has hit a pause - due to the flannel I ordered being incorrect! I am feeling very calm about the craft market, scarves are nearly finished, cards are finished, brooches are finished, make-up bags will be complete, once the replacement zipper foot arrives (I left it out and the cats swiped it), starting baby-grows tonight, so it's all going well!

I usually get a bit excited about craft fairs and next weekend is no exception to this! I think it is going to be a good opportunity for me and my little business, I hope it works out well and that my friends are happy for me to keep crashing with them, so I can become a regular at the market.

It's my sister-in-law's birthday tomorrow and my Ma's on Sunday, so I have been making little treats for them over the last week or so and now have a little pile of pretty things to wrap, which is nice.

I need to update my craft picture stash - so I was a bit stumped about what I should have as today's pic, then I realised I could show you the pattern for the Union Jack - so that is what today's pic is!

Enjoy!

Cx

Wednesday, June 30, 2010

Countdown to the Holibobs!

I have to apologise for the slight change in the appearance of my blog, but I got some feedback, I agreed so I updated!
I think it looks better - hope you agree.
There will be a couple more changes whilst I get used to the whole CSS thing, apologises, but I want it to be just right.

Anyway, in 3 days I will be off to sunny Cornwall with the entire Grantham clan for several days of rest.

I love going on holibobs, but I miss crafting, I get itchy hands!

Recently I had to work away from home for a week, so I thought about what would be small enough to carry in my suitcase and easy to make.

So I packed up a little kit of my button brooches and made lots of them whilst I was away.

Today's pic is of one of my fave brooches, this one has a fabric backing, but sometimes I make them without. The fabric was kindly provided by my Mother-in-Law and were actual fabric swatches! The buttons are kind donations from the button collections of various friends and family members. Oh and sometimes from my very own collection.

I am working on a full tutorial with pictures, but for now follow these steps.

You will need -
3 buttons (small, medium, large), good weight fabric square (optional, but make sure it's big enough to peek out from behind the large button), thread, needle, tweezers, scissors, pinking shears, button backs (I like round 12 or 16mm ones from eBay) and industrial superglue.

Instructions -
  1. Make sure your 3 buttons fit together (small onto medium, medium onto large)
  2. Sew small and medium together, make sure they are sewn tight together, but don't use too much thread, or they won't fit onto the large button
  3. Apply glue to bottom of medium (not the side with small on), tweezers are handy here.
  4. Affix medium to large, use tweezers to hold together for 4 seconds
  5. Wiggle to test bond - if firm, leave to dry for 10 minutes
  6. Follow steps 8- 10 if you don't want to add fabric, but include step 7 if you do
  7. Apply small amount of glue to large button, affix fabric, hold for 5 seconds, if firm leave to dry and then cut to shape using pinking shears. Then follow steps 8-10
  8. Use tweezers to hold button back, apply glue to round side and affix to large, use tweezers to hold in place for 5-10 seconds or
  9. Wiggle to test bond - if firm, leave to dry for 20 minutes
  10. Wear your new brooch!
Please leave me a comment if you want me to help you or if you think any of the steps are unclear and please do send me pics of the ones you make. I'll be running a competition in a couple of weeks, for you to win a button brooch kit!

Cx