Showing posts with label sequins. Show all posts

Tuesday, June 17, 2025

Retro Rubber Challenge #257 - Tic Tac Toe..

Hey,

Welcome to another fun Retro Rubber challenge.

We have a fun tic tac toe board for you this time.


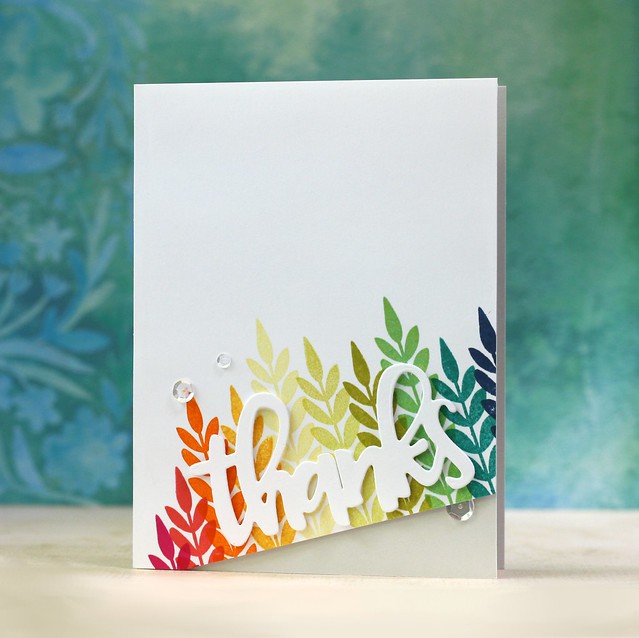
I was spoilt for choice with this board. In the end, I went with the diagonal row, top left to bottom right - Sequins, Shaker Card and Die Cut.

I had cut this shaker card idea about a year or so ago, and it was just languishing on my desk! To create this card, I cut x2 panels of the pretty floral paper and affixed one of them to my card blank. I die-cut a circle from the other panel and added some acetate and foam tape to make it into a shaker panel. The sequin mix in my shaker is very cute, it has teeny tiny little butterflies in it too.

The sentiment is from one of my all-time fave stamp sets by Neat and Tangled 'Awesome' I have had it since 2016.

I stamped the sentiment in navy ink as I thought it would fit better with the colours of the paper.

Fun card, I so rarely make shakers, which I might need to correct :)

Which row will you choose? Pop on over to Retro Rubber, and get inspired by the things the DT have made.

Challenge ends June 27.

Don't forget to tell us the age of your stamp, that is part of the fun of our challenge, and please only enter 5 challenges including Retro Rubber.

Cx

Monday, November 11, 2019

NND InkyPaws - Ornamental Newton..


Hey,

Hope you are well and had a good weekend.

I am currently playing along with Kathy Rac's 30 days of colouring and Carabelle Studio's 30 days of ATStamps. Busy, but a lot of fun. I'll show you both of them at the end of November.

Today I wanted to join in the fun over at Newton's Nook. I really like their Inky Paws challenge and I was sad to hear recently that Newton had passed away. Always sad when we have to say goodbye to fur babies.

The current challenge is a colour one -


I love non-traditional Christmas colours and so I thought these colours would make a great holiday card and work really well with the lovely 'Ornamental Newton' stamp set.

I stamped snowflakes in green and teal (Snowflakes are by Simon Says Stamp) and die-cut the panel out.

I added a big teal piece of card to hold my sentiment and anchor Newton.

I love the bauble, so big and bright in the 2 shades of pink that I used. I hope it's ok that I coloured Newton in Grey?!

I added a few teal sequins here and there to finish off my card.

Cx

Monday, September 23, 2019

Duh-nuh...


Hey,

Happy Monday!

I had a great weekend, hanging with Hubby, as I am semi-housebound due to the crutches and the boot!

I LOVE pun cards and I had this fun idea to make a pun card from every punny set I have for a friend.

I have been cracking myself up with some of these cards.

I am in love with today's card.

It's actually a CASE of Kelly-Marie from Lawn Fawn's card.


I thought it was so clever, the way she made the 'card' in a frame and it gave me an excuse to break out my We R Memory Keepers Frame Punch Board.

I started my version of the card, by creating the sea, using the MFT 'Make Waves' stencil - I am super pleased with my sea, it is perfection and I am so happy to have finally mastered this stencil (big shout out to Jen at Newtons Nook for her tutorial..).

I blended more blue ink to the top part of the sea panel and then heat embossed my clouds in. The clouds stamp is from the Clearly Besotted 'Trouble in a TuTu' set and I had never used the clouds until I made this card!

This version is no longer available
I stamped, coloured and die-cut the Shark, Fish and Fin from the Lawn Fawn 'Duh-nuh' set and using the great Ocean Wave Accents dies, I added them to my frame.

Final touches were to stamp the sentiments, mount onto a card blank and add washi tape and a sequin.

LOVE this card, I'll be making it again.

Cx

Tuesday, August 13, 2019

Retro Rubber Challenge #117 Anything Goes..


Hey,

Welcome to another awesome Retro Rubber challenge.

We have everyone's fave theme this time -


Anything goes is always fun, but it does give me a bit of stage fright, all the things I could use!!

I had a fun playtime making my card today, it actually ended up spawning x2 cards!

It all started with this fun background that I made using a Dina Wakely stencil and distress oxides.


I used my newest tool the Wendy Vecchi Stay-Tion - it is amazing for stenciling.

I used a stitched rectangle die to trim down the stenciled panel, then I used a semi-circle die to cut a window. After I cut the window I decided that this card had to be a shaker!

The Dog stamps are Party Time by Hero Arts (no longer available) and I have had them since 2016 - true confession, this was their first-ever use..the shame.

I stamped the sentiment from a set I just bought second-hand (Pink Fresh Studio set) - directly onto the card blank. I love the sentiment and I thought it went perfectly with the happy dancing Dogs. I created the shaker piece and affixed it to the card blank. Then I added 3 of the dogs around the window.

I love it and I already sent it to a friend as a birthday card :)

Remember I said that I made x2 cards? Well here is the second card using the piece I cut out to create the shaker window and another one of the HA Dogs.


Looking forward to seeing your anything goes makes, be sure to pop on over to Retro Rubber and get inspired by the things the DT have made.

Challenge ends August 23rd.

Don't forget to tell us the age of your stamp, that is part of the fun of our challenge and please only enter 10 challenges including Retro Rubber.

Cx

Monday, April 1, 2019

Happy 50th Disco DJ Diva...


Hey,

Welcome to April!!

Today I am heading to Lille with my Momma for a 2 day break, we will arrive just in time for lunch, so we are super excited about that.

I can finally share the card I made for my friend Marie's 50th Birthday. She is a dj and loves disco, so I really wanted her card to capture that and her fabulousness. She is so fabulous that Hubby and I asked her to sing the song (Disco Inferno) for our first dance at our wedding and she was amazing.

So I found a great digital image and retouched it a bit to get the look I wanted. Once I printed it out, I added bling, sequins and sparkly gold Thickers numbers.

It came out even better than the vision I had in my head.

Marie posted a photo of the card saying how much she loved it and that made me really happy and pleased that I nailed it.

Cx

Sunday, July 22, 2018

Even more Christmas in July....

Hey,

So following on from yesterday's Christmas in July post, I wanted to share my Christmas make ;)

I bought these awesome Christmas Portraits stamps from Le Petite Market and couldn't wait a month to play with them (I start Christmas card making in August).

As with the Animal Astronaut cards, I retouched the images, so that they would be white against any background papers I added.


I coloured the images and added glitter glue, nuvo drops (coloured and glittery), spectrum noir sparkle pens and sequins / stars for interest.


Once I had stamped the sentiments, they looked a bit boring, so I added a glittery strip to the card blank, way more festive.

Feels pretty good to have the first batch of Christmas done.

Cx

Sunday, July 8, 2018

Daring Cardmakers: July Elemental Challenge...


Hey,

Happy Sunday to you.

I am obviously quite happy with the current World Cup situation, my nerves will be shot to pieces on Wednesday though, during the semi-finals!

I found this awesome challenge Daring Cardmakers yesterday and I LOVED the cue-card -


I am loving yellow right now.

You have to use at least 3 of the elements from the card above on your project.

I chose, Flowers, Foliage and Colours (Pink and Yellow).

I love flower vase stamps and especially the ones by Unity Stamp Co. The one I have used today is from the 'First friend, best friend, forever' set and it is totally overused!

I watercoloured it using distress ink and then stamped the sentiment (from a freebie set). I then used foam tape to mount it to my card base.

I added sequins, gems and glitter glue for some extra sparkle.

I love bright and cheerful cards like this. A great addition to my stash.

Cx

Sunday, February 18, 2018

MFT Creative Olympics 2018: Event 3 Crafty Biathlon..


Hey,

So I just realised that my cards for the first two events won't qualified, as I mixed MFT products with other ones.

No matter, I am having fun, so I am still playing along with all 4 events. These things happen and 2018 is my year for putting less 'blog / craft' pressure on myself and remember to have fun.

So for event 3 MFT have a -


Choose one thing from each of the columns below and combine to make one card.

I went with Emboss Resist and Shaker.

Two of my fave things..

As I made an error with my first two cards, I was careful with my products here.

I decided I wanted to have a vague nod to the Olympics in my card, so I pulled out x2 flower sets by MFT 'Pretty Posies' and 'Large Desert Bouquet' and used a mix of circle stamps to create my embossed background. I heat embossed the circles using white powder.

I then watercoloured over the heat embossing to get the resist and I used the 5 Olympic colours.

Using my fave scalloped peek-a-boo die by MFT I die-cut through the background, to create the window for my shaker.

I filled the shaker with sequins from my stash in co-ordinating colours.

Obviously I had to add Monsters to this already awesome card and used two of the monsters from the MFT 'More Monsters' set. The sentiment is also from the set and I used stazon ink, so that it would stamp properly over the heat embossed background.

Fun, bright and cheery is the end result and it's a teeny bit busy, but I love it.

I'll be back with event 4 tomorrow.

Cx

Sunday, May 14, 2017

Elegant Shaker Cards...


Hey,

Happy Sunday to you.

Today I am hanging out with the Craftgang at Jamey's studio making stuff, gossiping and mainly eating!!

I thought I would share 2 cards that I finished off last weekend in my massive 'finish the half done projects on my desk' day.

These cards came about because I bought the MFT Peek-a-boo circle window dies and I thought it would be fun to make small shaker cards with them. I like that you get two different dies in the set.

Both of the shaker pouches were made using my Fuse tool and were just sitting around waiting to be used. Sometimes when my mojo goes on vacay, I make shaker pouches in all shapes and sizes.

The cards are actually quite small, as I used Target card blanks.

The anniversary card uses a Die-Versions die, a stamp and shaker contents by Simon Says Stamp.

I kept the other card simple and used a freebie Just a Note stamp, the shaker contents are also by SSS.

Elegant, simple shakers. And everyone loves a shaker card - right?

Cx

Friday, April 14, 2017

CASE Laura Fadora...


Hey,

It is Good Friday today, I am still in London, heading up to my in-laws in MM today to reunite with Hubby and hang with his family for a couple of days.

I love Laura Fadora, she is totally one of my craft crushes, I love how she uses colour. She is very inspiring.

I loved this card she made -


I have the Give Thanks stamp set by Concord & 9th, that Laura used on her card and it has been a bit neglected, so I decided to have a play.

I made mine into a colourful birthday card. The Happy die is by Wplus9 and this is my first time using adhesive foam for dimension. I really like the effect you get and I am super happy with my card, I love the different shades of colour.

I use Tsukineko inks, I have nearly all of the memento dewdrop colours, they are easy to store as they are small and I love the colours. I do have the odd inkpad by other colours, but these and distress inks are my default. One day when I have more space I would love a set of Lawn Fawn inks..

Here is a variation using Amazeballs stamp set by CAS-ual Fridays.


Slightly different as the stamp is not solid, gives a more subtle effect..

Cx


Friday, April 7, 2017

Cat treats...


Hey,

Happy Friday!

As this posts I am landing in London, I have today off and will be hanging out with my folks.

I love Lil' Inkers and recently they had a great sale, so I bought a couple of new releases and an older Christmas stamp..

I stamped and coloured all of the stamps as part of last month's 30 days of colouring.

Today's cards were made using the Cat Treats stamps and dies. I love this set, so fun and has a lot of potential.

The main card was super simple. I have a pad of We R Memory Keepers gold and kraft papers and chose a striped one as the background and die-cut it using a stitched MFT rectangle die. I stamped one of the sentiments from the set onto a kraft stripe and added the cats.

The card below was a bit of an experiment -


I used a background that I stamped when I was at a craftgang playdate - I love Jamey's background stamp collection, I always make a beeline for it when we are at her place.

I die-cut the stamped panel twice, once with a stitched rectangle die for the edge and then I used my new MFT peek-a-boo circle die for the aperture.

The experiment part is the 'faux' shaker. I stuck the sequins to the card blank and added a piece of acetate to create the shaker illusion, but the sequin's don't 'shake'.

I added the cute kitty and a sentiment from the set.

I really like it, Hubby thinks it's too busy LOL...meh. What does he know.

Cx

Wednesday, March 29, 2017

Addicted to CAS: Seaside..

Hey,

The cue card over at Addicted to CAS felt perfect for me right now -


I am LONGING for Summer, this Winter hasn't been too bad, we have had amazing mild days..but when it has been cold..oh my.

Seaside made me think of trips with my family, food, flip flops and Crabs.. I think I think about Crabs too much!!

I thought my Your Next Stamp Flippin' Fabulous set would be great for this card.

I die-cut the white panel using a Simon Says Stamp stitched rectangle die.

I stamped the sentiment next, so I I knew where to put the double stitched circle die also by SSS to create the 'porthole' to the 'sea' (aka card blank).

Mount the Crab with foam tape and add a couple of sequins and voila! we are at the beach.

Cx


Wednesday, February 15, 2017

Showing off my MISTI Skillz...


Hey,

It was JT's birthday last week and I bought her a faux MISTI - works the same, just 50% cheaper.

I thought it would be good to make something to show her the benefit of this extra tool (I love a tool and keep enabling her...)

I stamped these cards using the MISTI and it makes it ALL so much easier.

I die-cut the white panels first, makes it easier to position everything.

Then I stamped the doily border in four different colours, no need to move the stamp, just clean and put a new piece of paper in the MISTI.

The stamps were a freebie as part of Stampin' Up Sale-a-bration and are called Delicate Details..I am already in love. The inks were also a freebie from my Retro Rubber teamie Debbie (who is my SU demo) she had a spare set and sent to me, how sweet is that!

The hello stamp is by WPlus9 and again, I lined it up using the MISTI and stamped it 4 times, simples.

I mounted the white panels onto grey card blanks and added some sequins.

Super simple, elegant cards that were a breeze to make.

Cx

Monday, December 26, 2016

Boxing Day thanks...


Hey,

Happy Boxing Day to my English / UK based peeps.

Hope everyone had a nice Christmas.

I thought it was a perfect day for me to share a 'Thank You' card.

Before Christmas I had a playdate with some friends and I stamped a bunch of the backgrounds that you can see on my card today, the stamp belongs to Jamey. I LOVE this stamp, it is by Taylored Expressions and I think I need it in my life..

This one I stamped with Picked Raspberry distress ink, spritzed and dried.

I die-cut the panel using my absolute all time fave Simon Says Stamp stitched rectangle die and then stamped the sentiment, also by SSS.

The flower dies are shiny and new and this is their first outing, aren't they pretty! I ran a piece of black card through my Xyron before die-cutting them, making it easier to affix them to my card.

I added a few Neat & Tangled (freebie) sequins to the card to finish it off.

So pretty and simple, you'll see me using more of the backgrounds that I stamped over the next few weeks..

Cx

Tuesday, December 20, 2016

Shaker Snow Globe Tutorial...


Hey,

No Retro Rubber today, we are on our Christmas break, but we return on January 17th ready for a whole new year of fun, I do hope you will come and play with us then.

As it is nearly Christmas I thought I would share a tutorial with you..

I made this fun shaker as part of my Christmas card stash because I got a freebie snowglobe stamp and I wanted to play with it.

It was pretty straightforward.

Step 1
I stamped my globe and sentiment, using my MISTI. Then masked off my sentiment (by Clearly Besotted) using post-its.


Step 2 -
I inked up my snowflake background stamp (by Sizzix) added a spritz of water and then laid my paper onto the stamp. Remove the mask and this is the final stamped panel.


Step 3 -
I used a circle die to cut the aperture (badly..) for my shaker.


Step 4 -
No photo of this step, make your shaker pouch, affix to the back of the card and mount the card front using foam tape onto your card blank.

I added some Stickles here and there to make him shimmer a little bit more.

Super easy and look how pretty he is! Bar the dodgy aperture, but whatever, he is handmade and how many shaker snowglobe cards do you think the recipient will get? Ha ha.

Cx


Sunday, December 18, 2016

CDT 423...A good day to be awesome...


Hey,

Happy Sunday to you.

I saw the great colours over at Color Throwdown this week and knew I had to play along..


I had a lot of fun making this card and the unusual colour combo really worked for me.

I decided I would put some Picked Raspberry distress ink onto my craft mat, spritz it and smoosh my watercolour paper into it, to create the hot pink background for my die-cut. I did this until I got the colour I wanted.

I used the Neat & Tangled Hexastar cover plate and boy is that hard to cut :) But It meant that I got some random triangles that didn't pop out and I actually really like it.

To enhance the hot pinkness I used a finger dauber and more of the ink around the edges.

I created the lime background using Lime Twist distress ink and a blending tool.

I used foam tape to pop the cover plate up and then die-cut the awesome from the Neat & Tangled set of the same name in red paper to fit the colour scheme. The rest of the sentiment is from the stamp set that goes with this die and I stamped that on a scrap of lime paper.

Finishing touch was to add a few lime and red sequins around.

It's bright and a bit in your face, but I love it, great make for a Saturday morning :)

Cx

Sunday, July 24, 2016

Happy Birthday Hubby...


Hey,

It was actually Hubby's birthday on Thursday, but I wanted to include pics from his birthday celebrations in my post..hence why it is being posted today :)

It was the most epic birthday, starting with seeing Billy Joel at Madison Square Garden on Weds - he was AWESOME.

I took Hubby to the Grand Central Oyster Bar for his birthday lunch (I had 1/2 a day off) and then we met up with friends at a local floating bar (the Crows Nest) at the Water Club on the East River.


From left, view from the bar of the East River up to the UN (white building), Hubby at GCOB, blue drink (named after me 'Mrs G'), Epic group selfie and Hubby with his sparkly birthday cake!

Friday was very, very hard, but it was worth it, because he had such a great time.

His card was made using the Lawn Fawn Year Five set - Cheiron gave it to me as a gift, because I call Hubby Otterboy :)

I love birthday's, a most excellent excuse for laughing, eating and drinking with the people you love.

Cx


Sunday, July 17, 2016

CASE a Card...Layers..

Hey,

I've recently been going through my Pinterest board of 'craft ideas' I pin tons of things and then never do anything with them..

I decided that I would choose a handful of cards from the board and CASE them.

Here is the first card I chose -
Image courtesy of My Paper Secret.
Cool card right?

As you can see from my main photo my first card, was a reasonably true CASE.

I used a page from an old Thesaurus for the 'dictionary' style paper, a piece of Lawn Fawn Polka Dot paper, two scraps of American Crafts patterned paper (one for the vertical strip and one for the bird), the sentiment is by Simon Says Stamp and I added sequins and bling.

I love it and as it was such a fun formula, I made a couple more...

Different sentiment and a Crab!

Rotating the spotty panel changes the layout just slightly
I love them all and I especially love that you can read a bit of the thesaurus pages, adding a bit of extra interest.

I am also a bit in love the Hero Arts 'I miss that face of yours' sentiment - it is totally something I would say.

Cx

Thursday, June 30, 2016

Eat Cake....


Hey,

Just popping in today with a quick little card that I made for a friend's birthday.

I bought the cute little cake stand stamp from Unity Stamp Co a while back, this is it's first outing and I love it.

I used Gina Marie dies for the fancy stitched scallops and the pale pink embossed piece was a gift from JT, she has this amazing Houndstooth folder and embosses a bunch of them in various colours for me, so I don't steal her folder...

I decided that I was going to stamp a sentiment onto a Simon Says Stamp scribbly banner, so I went into the envelope to get the die and the sentiment banner you see fell out!!

If I die-cut and stamp things but don't use them, I put them back in the die envelope..it was meant to be here, love it when that happens.

I added some sequins and bling as a final touch.

Another simple quick card to make, I hope my friend likes it.

Cx


Monday, June 27, 2016

Make 5..Umichka Challenge..Card Five..the final one.


Hey,

Happy Monday

Sadly, this is the final card for the 'Make 5 CASometry Challenge' over at Anna / Umichka's blog.

You have to use the same stamp set for each of your cards and keep the cards CAS. You can see my previous cards hereherehere and here - phew!

The rules for the final card are slightly different..

You still have to use your chosen stamp set, but you have to CASE a card on this Pinterest board - very cool idea.

I chose this card by Lindsay at Occasional Crafting as my case -


I really love the simplicity of it and thought my set would work well here..

To refresh your memories, this is the stamp set I am working with -
It's from the October 2015 SSS stamp kit.

I used the big heart, the thanks sentiment and the little hearts for my card.

The polaroid frame die is by Kaisercraft and I used it with a piece of scrap American Crafts paper. I affixed the frame to my card blank and placed the large heart into position, so I could stamp the little hearts in the right places.

The sequins are by Lucy Abrams..love her sequins..

I loved making this card, so sweet and always fun to use sequins.

I have kept all of the cards and will be giving them to someone as a little gift at the end of the challenge.


This was such a fun thing to do, helping me to stretch a stamp set and reminding myself that I don't need millions of things (even though I want them) to make pretty things..

It's also a perfect fit for this week's CAS(E) this sketch..perfect..as it's already a CASE..lol..

Cx